Donald R. Hicke
The next best thing to using a fresh, new roll of tape for recording that important concert or other one of-a-kind performances is to bulk erase an old reel of tape. This is especially important if the erase head on your recorder is not very efficient, or if you use high-output tape, which is difficult to erase. Otherwise, the previously recorded material may be audible during the more quiet passages of the new recording.
A bulk tape eraser consists of a coil of wire wound around a laminated iron frame open on one side. When the coil is connected to an a.c. source and held near a reel of tape, the magnetic circuit is completed through the iron oxide coating on the tape, effectively erasing any recorded material. Commercial tape erasers use a specially-designed coil, but you can make your own eraser using almost any old transformer. Good results have been obtained with filament transformers, audio output transformers, and power-supply chokes. All you have to do is take the transformer apart and rearrange the core pieces. The accompanying pictures will show you how.
To use the eraser, hold it directly against the reel of tape and turn on the power. I used a push-push switch in this version, but this is only a convenience item. You will hear and feel the tape vibrate at 60 Hz. Move the eraser all around the reel, then repeat on the other side. Slowly move the eraser several feet away from the tape before turning off the power.
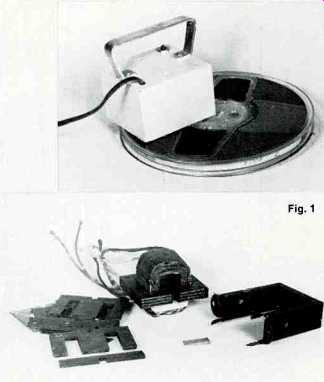
Figs. 1-4
Fig. 1--This transformer was salvaged from a vacuum-tube amplifier. Pry up and straighten the four tabs, and remove the frame. Pull out the wooden wedge(s), and remove the core pieces by prying them apart with a sturdy pocket knife. Do not cut into the core winding!
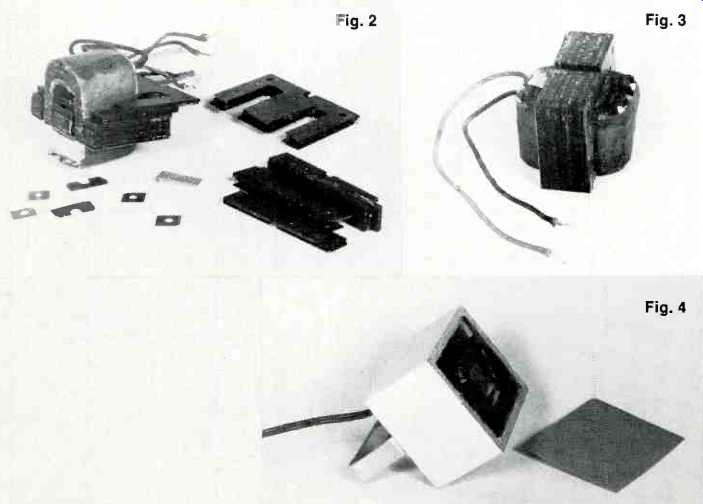
Fig. 2--Reassemble the E shaped pieces, facing them all the same way. Discard the I-shaped pieces. Clip off and discard any extra-length tabs on the two outside core pieces.
Fig. 3--Reinsert the wedge(s), and clip off all wires except the primaries (plate-to plate for an audio output transformer).
Fig. 4--Pass the a.c. connection cord through a rubber strain-relief grommet and then through a hole in a suitable box. Connect the a.c. cord to the coil, making certain each connection is well taped and the whole is well insulated.
Locate the grommet, and mount the coil. Cover the bottom of the box with cardboard. Fasten a handle with screws, and paint the box.
(adapted from Audio magazine, Jan. 1971)
Also see:
Tape Transport Maintenance--Part 6--Brakes (Oct. 1970)
Tape Transport Maintenance PART 5/Heads, Guides, and Pressure Pads (Apr. 1970)
Choosing a Tape Recorder (Apr. 1972)
= = = =