|
|
.Even today, vintage audio treasures abound---if you know where to look.
I was reminiscing eith John on the eBay forum, a while back, about how I got started in the hobby of electronics. Many of you probably have similar stories. By the time I was 10 years old, I was hauling home TVs, radios, and any other electronic “junk” I found discarded by the side of the road on trash pickup days. I would spend hours dismantling, sorting, and organizing the parts I collected.
Even though I may date myself, I spent hours at the drug store testing tubes. Family friends would bring me stuff to “fix,” and many times I was able to do so. Back in those days the wiring and layout were designed to be easy to service and pretty straightforward. I had cigar boxes full of resistors and capacitors, boxes of transformers and tubes, and even salvaged hook-up wire—a much simpler time.
Today, I still find my way to electronic and surplus stores to scrounge through old stuff looking for treasures. Recently, I bought an old piece of test equipment and when I started tearing it apart, it struck me that this is a very enjoyable part of my hobby and allows me to in expensively build tube audio equipment. I thought I would share this with an audience. I am going to break this down and present the economic advantage as well as the ecology benefit to scrounging.
ONE MAN’S JUNK...
I found a Heathkit IG 62 Bar Dot Generator (Photo 1) at a surplus house and paid a princely sum of $15 for it. You can also find a huge amount of old un used test equipment at estate sales and online. Obviously, this generator is not of much use to anyone in today’s world of digital and HD TVs. Upon removing the case, I was surprised at the number of tubes and parts in this unit—pretty hi tech for its day.
I am not saying that all the old stuff out there will yield the kind of bounty this did, but it is pretty typical of old tube test equipment. This piece of equipment was full of brand-new-looking Mullard tubes. Upon closer examination, I found that there were 4-12AU7s and 6-12AT7s, all Mullards! Pulling out the trusty tube tester, I proceeded to check them out. They all tested like new, and the sections were extremely well balanced. You really must love the old high- quality manufacturing standards of that day!
When I started testing the other tubes, I found the exact same thing, with the exception of the OA2 regulator tube, which was shorted. This explained the lack of a fuse in the fuse holder. (I would never plug in an old piece of test equipment to see whether it worked—as you know this can cause a lot of damage to components that haven’t seen electricity in many years.) If this were an audio amplifier, I might bring it up slowly on my trusty Variac to see whether it worked, before I rebuilt it or dismantled it for parts.
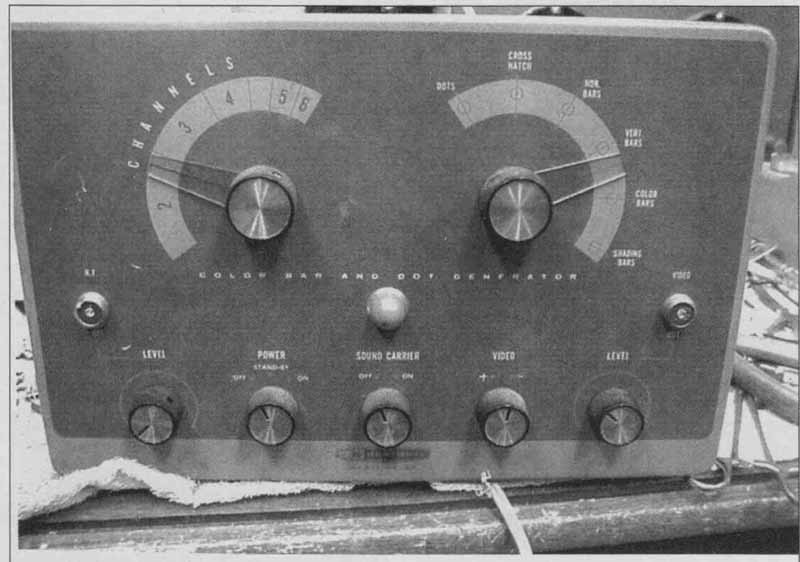
PHOTO 1: Heathkit IG 62 ripe for salvaging.
DISASSEMBLY
When you start your dismantling project, here are a few hints:
1. You can clip long leads close to their connect points and clean the terminals or sockets later (I will give you a couple of methods of doing this).
2. Unsolder short connections with a good 50W iron (I have an old one I use just for this—you can also use a Weller type 100/140W gun if you are careful).
3. You will need some sturdy needle-nose pliers and some hemostats/forceps/heatsinks.
4. Never try to reuse electrolytic capacitors unless you have a capacitor test meter and reformer (I built one from an older issue of Glass Audio and it works great), although I reuse very few.
5. Don’t try to salvage or reuse paper and wax caps, and unless you have a cap meter to check value and leakage, don’t even try to reuse black or sealed type (more on this later).
6. Mica caps and most ceramics will be fine.
I usually start by clipping all the components I can and separating them into small plastic cups. Remove any trans formers and chokes and label their leads, especially if they are not the universal color-coded ones. I also save all the vintage hardware by size in a small portioned clear plastic box.
I recently wrote an article about a vintage amp I built. Many of the components of this amp were salvaged items and it truly looks the vintage part.
Once this is done, you can begin removing the cut leads from the sockets, terminal strips, and controls (I do this before removing them from the chassis, to keep things stable). I do this by heating the connection with my big iron or gun, and when the solder is molten, grabbing the individual leads one at a time and removing them. This can be easy or hard depending on the original builder of the item. Some builders just looped the wire through the various terminals, so they’re very easy to remove. Some people wrapped the leads around the terminals—even two to three times in some cases—and crimped them tightly. These can be difficult to remove, but with a little careful work it can be done.
My favorite tool for this is a heavy, short pair of stainless-steel surgical hemos, which have a very sharp rounded nose about 3/8” long and about 1%” wide. They are heavier than your run-of-the- mill hemos, and are high quality US made (I wish I could remember where I got them so I could buy several more). You can also use quality medium-size needle-nose pliers. You want something that has very accurately aligned jaws and sharp serrations. Take your time and don’t make this a battle.
John has a very effective way of dismantling equipment, but it requires safety glasses and long sleeves and preferably gloves and a hat. He hooks up his air compressor to a blow nozzle with a pushbutton air valve, heats up the connection with his Weller gun, and blows a sharp blast of air at close range, while the solder is molten. This sprays solder everywhere (hence the protective wear), and so you need to do this in a shop or area where you can contain the residue (older solder contains lead). When he has finished blowing all the solder away, it is a real easy job to heat the joint and remove any wiring on the sockets and terminals.
Now you have a chassis with terminals and sockets splattered with solder. There are two ways to remove this. John places the chassis in a bead blasting cabinet in his shop and gives it a quick blast. This not only cleans up the solder mess, but also removes any corrosion that may be on the terminals. You need to remove any pots or rotary switches before you bead blast. If you don’t, you will most likely ruin them (or at least make them real noisy). As I said, this is his method, it is dangerous, and you must wear eye and skin protection should you choose to use it.
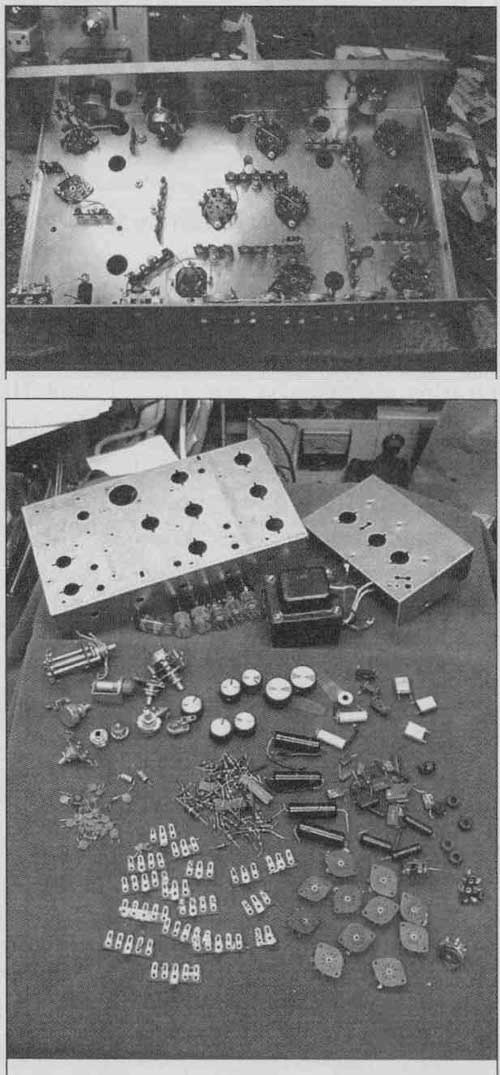
Above: Photo 2 and 3.
SALVAGE SAVINGS
Once the solder is all removed (Photo 2) you can begin the mechanical salvage of the chassis. Remove all the hardware, inspect each socket and terminal, and keep what is good.
I have many large plastic bin cabinets and as I sort parts to these, I check them before I put them in. All the capacitors get tested for value and leakage and if they don’t pass they are gone. I sort resistors, but don’t check their value, because I routinely check them when I am building or repairing equipment. I cleaned switches and pots with DetoxIt and tested them.
At this point you probably have a pretty bare chassis, case, and front panel. I usually keep these also. You can reuse the cases, the front panels, and the chassis for prototyping or actual construction. The vintage 6L6 amp I mentioned earlier used a chassis from an old telephone amp. Sometimes part of the fun is making use of something rather than have it end up in a landfill.
You can see from Photo 3 that there is a considerable pile of parts from this little salvage. Just for fun I went through them and got an approximate cost for new parts. (I used Antique Electronic Supply catalog to compare prices.) The results are:
- Power transformer (this has already been used to make the power supply for an amp project I will be submitting, using subminiature tubes) $35
- Fuse holder $1
- Line cord $50
- Strain relief $50
- 6 Mullard 12417 tubes (I sold 5 of these on eBay) $56
- 4 Mullard 12AU7 tubes $80
- 1 6B07A tube $2
- 1 6CSB tube $3.15
- 1 0A2 tube (bad)
- 2 .015MF 400V 10% ceramic caps $1
- 3 0.5 200V Sprague Black Beauties $3
- 1 .25RF 400V Sprague Black Beauty $1
- 2 .01MF 600V Sprague Black Beauties $1
- 11 0.1 200V Sprague Black Beauty $1
- 3 10W power resistors $1.85
- 3 Crystals and sockets $3
- 22 Mica caps 200-600V $11
- 2 4.7pF HiQ capacitors $1
- 25 ceramic disc capacitors $4.50
- 61 1/2w carbon comp resistors $15.25
- 1 1w carbon comp resistor $1.50
- 1 2w carbon comp resistor $1.50
- 2 germanium diodes $3.50
- 5 nice 1 1/4 knobs $10
- 2 nice 1 1/2” knobs $4
- 1 1M-ohm pot $2
- 1 200-ohm pot $2
- 4 wafer switches $8
- 2 jacks $4
- 1 fuse holder $1
- 1 6V pilot light assembly $2.25
- 16 terminal strips assorted sizes $6
- 10 Spin wafer sockets $20
- 2 7 pin wafer sockets $4
- 1 9 pin molded socket $2.25
- 8 grommets $2
- 1 small variable cap $10
- 2 trimmer caps $1
- 5 ground lugs $1
- 4 section can cap (may or may not be good)
- Aluminum chassis
- Aluminum sub chassis (see note later)
Total $307.75
I paid $15 for the generator and salvaged $307.75 worth of parts from it. Even if you just take the original $15 investment and subtract from this the $56 I got for five Mullard 12AT7s, that is a profit of $41. Not too bad for getting a bunch of free parts.
RECYCLING
So the question is: Do I use these parts? You bet I do. Many of my vintage audio restorations require older carbon comp resistors. Pots and switches are always in demand. I already used the 6V pilot light in a guitar amp restoration. I also used the power transformer, fuse holder, power cord, some grommets, and terminal strips for a power supply for a pair of SE amplifiers using subminiature tubes.
As I said earlier, I use the chassis from this type of salvage for prototyping and even for finished projects. You can usually arrange your components to use factory holes and cover the sides or end panels with some wood. For example, Photo 4 shows the sub-chassis after cut ting some scrap pieces of maple, and putting it together with some glue and an air nailer. A little sandpaper, some spray clear finish, and in 10 minutes you have a perfectly good chassis for building a small tube amp project. (I am thinking a headphone amp.)
I am not suggesting that you go out and madly buy up old test equipment and try to make a living selling the pieces on eBay. What I am suggesting is that you can get a lot of really high-quality components, tubes, and transformers for other projects. This will not only save you money, but help the environment.
= = = =