Successful repair of your compact disc player depends largely on how well you can solder two wires together. Soldering sounds and looks simple enough, but there really is a science about it. If you are unfamiliar with soldering, or want a quick refresher course, read this short soldering primer.
TOOLS AND EQUIPMENT
Good soldering requires the proper tools. If you don't have them already, they can be purchased at Radio Shack and most any electronics store.
Soldering Iron
You'll need a soldering iron, of course, but not just any old soldering iron. Get a soldering pencil with a low-wattage heating element. For electronics work, the heating element should not be higher than about 30 watts. Most soldering pencils are designed so that you can change heating elements as easy as changing a light bulb.
DO NOT use the instant-on type soldering guns, favored in the old tube days. They create far too much unregulated heat, and they are too large to effectively solder most joints on a PCB.
If your soldering iron has a temperate control and readout, dial it to between 665 and 680 degrees F.
This provides maximum heat with the minimum danger of damage to the electronic components.
When you are not using your soldering iron, keep it in an insulated stand. Don't rest the iron in an ashtray or precariously on the carpet. You or some precious belonging is sure to be burned.
Soldering Tip
The choice of soldering tip is important. For best results, use a fine tip designed specifically for printed circuit board use. Tips are made to fit cert ain types and brands of heating elements, so make sure you get the kind for your iron. If the tip doesn't come pre-tinned, t in it by attaching the tip to the iron and heating it up.
After the iron is hot, apply a thin coat of solder to the entire tip.
Sponge
Keep a damp sponge by the soldering station and use it to wipe off extra solder. You’ll have to re-wet the sponge now and then if you are doing lots of soldering.
Solder
You should use only rosin core solder. It comes in different thicknesses; for best results, use the thin type (0.050") for PCB work. NEVER use acid core or silver solder on electronic equipment.
Soldering Tools
Basic soldering tools include a good pair o small needle-nose pliers, tweezers, wire strippers and wire cutters (sometimes called side or diagonal cutters). The stripper should have a dial that lets you select the gauge of wire you are using. A pair of ''nippy" cutters, which cut wire leads flush to the surface of the board, are handy but not absolutely essential.
Cleaning Supplies
After soldering, and when the components and board are cool, you should spray or brush on some flux remover. Isopropyl alcohol can also be used for cleaning.
Solder Vacuum
A solder vacuum is a suction device that is used to pick up excess solder. It is often used when desoldering--removing a wire or component on the board. Solder can also be removed using a length of copper braid. Most electronics stores sell a spools of it specifically for solder removal.
BASIC SOLDERING
The basis of successful soldering is that the soldering iron is used to heat up the work, whether it be a component lead, a wire, or what ever. You then apply the solder to the work. DO NOT apply solder directly to the soldering iron. If you take the short cut by melting the solder on the iron, you might end up with a '' cold" solder joint. A cold join doesn't adhere well to the metal surfaces of the par or board, so electrical connection is impaired.
Once the solder flows around the joint (and some will flow to the tip), remove the iron and let the joint cool. Avoid disturbing the solder as it cools; a cold joint might result. Do not apply heat any longer than necessary. Prolonged heat can permanently ruin electronic components. A good rule of thumb is that if the iron is on any one spot for more than five seconds, it’s too long.
If at all possible, you should keep the iron at a 30 to 40 degree angle to work, as shown in Fig. D-1. Most tips have a beveled tip forthis purpose.
Apply only as much solder to the joint as is required to coat the lead and circuit board pad. A heavy-handed soldering job may lead to soldering bridges, which is when one joint melds with joints around it. At best, solder br idges cause the circuit to notwork; atworse, they cause short circuits that can burn out the entire board.
REPLACING COMPONENTS
Replacing a soldered component first requires that you remove all the solder holding it in place.
Use the soldering iron to melt the joint, and as the solder flows, suck it up with a solder vacuum or wick it up with a copper mesh. Remove enough solder so that the component lead is free. If you can't get all the solder up the first time, let the joint cool and try again.
Clean the old joint and the leads of the replacement component in alcohol. This removes any oil that might impair the grip of the joint after soldering.
Insert the new component gently. Don't pull on the lead or you may damage the component. Once the part is seated on the board, bend the leads slightly to keep it in place. Solder as usual. If you are resoldering a wire onto a terminal, wrap the stripped end of the wire around the eyelet of the terminal prior to soldering.
A GOOD SOLDER JOINT
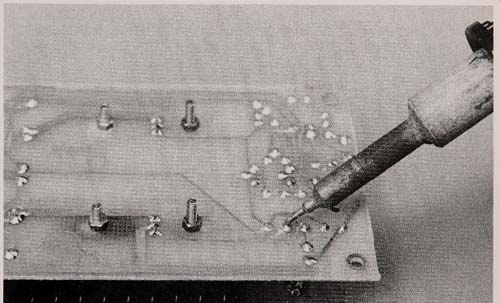
Fig. D-1.
Hold the soldering angle at a 30 to 40 degree angle to the PCB.
A good solder joint should be bright and shiny.
A joint that looks dull is probably cold and should be remade. The joint should not have any sharps peaks.
If so, the solder didn't flow well enough to make a good connection. Remake the joint, be-ing sure to apply the iron to the work and not to the iron. Excess solder that forms on the tip (an other cause for these peaks ) should be removed using the damp sponge.
ELECTROSTATIC DISCHARGE
Electrostatic discharge--better known as a carpet shock "--can ruin electronic components. You should remove the excess static buildup from your body by touching some grounded metal object prior to soldering, or before handling electronic parts and boards. If you are soldering transistors and integrated circuits, you should use a grounded soldering iron, as well as an anti-static wrist band and table mat.
TIP MAINTENANCE AND CLEANUP
After soldering, let the iron cool. Loosen the tip from the heating element and store it for next use. After several soldering sessions, the tip should be cleaned using a soft brush. Don't file it or sand it down with emery paper.
Invariably, little nuggets of solder will be left around after a repair job. Make sure that these balls of once-molt en solder balls are not left on the PCB or in the CD player cabinet. The solder may br idge wires or board traces together, and cause a ser ious short circuit. Inspect your work carefully and use a soft brush to wisk away stray bits of solder.
= = = =