This classic amp benefits from a facelift using today’s components.
The Dynaco 400 was the Tyrannosaurus Rex of power amps in 1973. I wanted one badly, but I was bringing up children and settled for the more affordable Dynaco Stereo 80, which pumped out music for the next 20-odd years. It also survived three teen-age boys.
In 1998, I spotted a Dynaco 400 in a used equipment shop, paid way too much, and dragged it home—all 60 pounds! Unfortunately, my “Dynasaur 400” was seriously flawed. It had a nasty habit of going DC and destroying speakers.
I spent more money unsuccessfully attempting to repair a unit with too many previous ham-handed repairs and modifications. Eventually I decided it was too old and complicated to fix and too big to use as a doorstop. Resistance was futile; it needed to be assimilated with newer technology (Photo 1).

PHOTO 1: Rebuilt Dynaco 400.

PHOTO 2: PM224 Module: 220W RMS into 4 or 8-ohm. Better than 0.01% distortion
at 1 kHz. Differential (balanced) or single-ended inputs. AC or DC coupling
(jumper selectable).
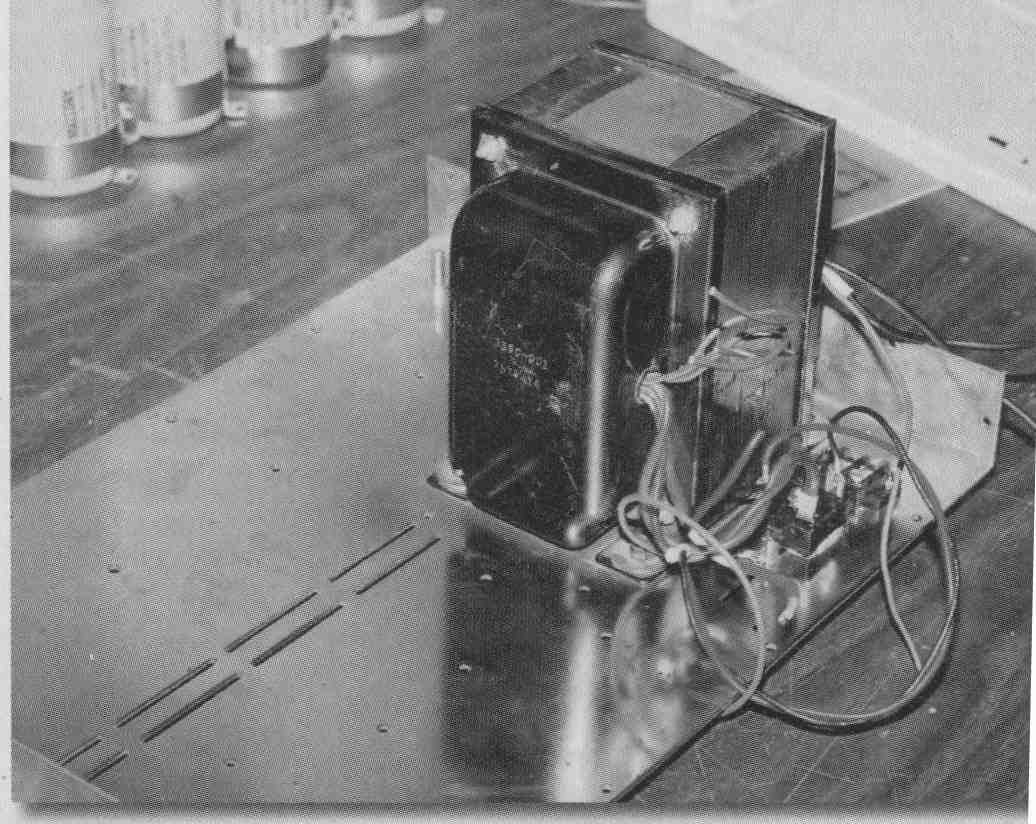
PHOTO 3: Bare chassis with Hammond transformer.
I decided on a rebuild that would retain the outward appearance of this classic amplifier, while replacing the innards with new components. After looking around, I chose to upgrade using a couple of compact 200W all MOSFET amplifier modules from Marchand Electronics in Rochester, NY (Photo 2). You can buy the PM224 modules as fully assembled and tested units, as kits with the PC boards and all parts, or as bare PC boards. See the Marchand site for details, specifications, and schematics.
The rebuild is straightforward. Strip everything but the massive Hammond power transformer from the old chassis (Photo 3). remove the face plate and hinge the front part of the chassis for ward. Clean the wiring from all front panel controls. Only the power switch and pilot light will be functional in the new amplifier.
Photo 3
The old Dynaco yields about $200 in parts—a 1,000 VA transformer, heat- sink, rectifier bridge, circuit breaker, switch, speaker fuses, connectors, and a sturdy chassis with lovely big rubber feet. On a good day, you can pick up an old, one- channel-good Dyna 400 for $50 on eBay; you’ll need to talk to the Teamsters about getting it to your place.

FIGURE 1: Regulated 65V power supply for Marchand PM224 power amplifier modules.
Despite the utility of the Dynaco’s original 15A power switch, I chose to use a triac to turn the amp on, believing that MOSFETs are more susceptible to switching spikes and noise than the transistors in the old amp. Audiophiles are, as Nelson Pass notes, a superstitious group. The triac power-on circuit is the same as that used in the Pass/Thagard A75. The voltage regulator circuit is taken from Pass’s “Complementary Zen” design. Thanks for both.

PHOTO 4 (top): PCB 1 mounted and voltage regulator MOSFETs bolted to the
transformer shield. PHOTO 5 (center): Power supply elements mounted and wiring
ready for modules and heatsink to be attached.

PHOTO 6: Power amp modules bolted to the heatsink.

PHOTO 7: Assembled unit. PCB 3 on the right; PCB 2 at the rear; modules below.

FIGURE 2: 65V power supply--block diagram.
Replace the old Dynaco PC30 power distribution board in front of the transformer with the new combined power-on and voltage regulator board, PCB-1. Drill a couple of holes in the transformer shield to bolt down the large voltage regulator MOSFETs (Photo 4). I used two old heatsinks as washers on the top of these devices, but they really don’t generate much heat. Place insulating pads or mica washers underneath them.
The large capacitors, C6 and C7, need to be bent over parallel to the board so that they clear the front panel—leave their legs long and cover with heat shrink-wrap. Connect the power switch and pilot light. The original Dynaco pilot is a neon light with a dropping resistor. Connect it across the transformer primary.
The unregulated side of the supply in my amp sits at about ±72V (Photo 5). The voltage regulator section drops this to a very stable and noise-free ±62V. This is not the 65V specified in the de sign, but it is close enough.
Both sets of filter capacitors are mounted on their own PC boards; 40,000uF before the regulator and 60,000uF after. PCB 2 fits on the far side of the transformer shield and PCB 3 on the inside of the front panel. You’ll need some spacers to get the front-panel board to sit above the old amp’s controls. Use the fuse block from the old amplifier for positive and negative sup plies to the left and right amplifier modules.
The two power amplifier modules from Marchand (Photo 6) bolt directly onto the base of the oversized Dynaco heatsink. They sit an inch above the floor of the chassis when the heatsink is replaced. They are very compact and fit well. You can wire the inputs and outputs of the amp modules before sliding the heat- sink back into the chassis.

PHOTO 8: Assimilated “Dynasaur 400” unit returned to service. Shown here
slowly burning in on a mix of Asterix, Orbital, Delerium, Enigma, and Infected
Mushroom.

PARTS LIST — Dynaco 400 Assimilation. Miscellaneous: terminal blocks, heatsink
compound, wire, ties, hardware.
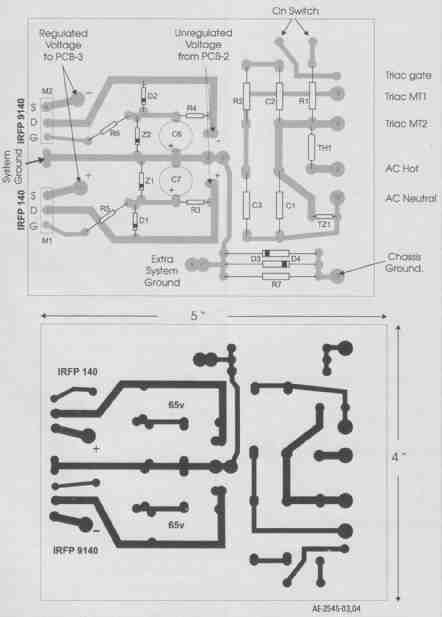
FIGURE 3 (top) PCB 1 voltage regulator, top side
FIGURE 4 (bottom): PCB 1 voltage regulator, copper side.
Thanks to quick-connect strips on the boards, hooking up power and ground wires is a two-minute job. As with the original amplifier, this one opens up nicely for service. The front panel tilts forward for access to the power supply. The heatsink and amplifier modules drop out as a single part once the power and ground wires are disconnected (Photo 7).
For now, I am very happy with the rebuilding effort (Photo 8). In many respects, the rebuild performs better than the original amplifier and runs much cooler. For the budget conscious, this is a 400W high fidelity amplifier that costs less than a dollar a watt. For people who like to party, this amp really makes a couple of 15” drivers jump. I’m sure glad the kids are not around to mess with my sound system any more.
Sources:
- Pass, Nelson, “Zen Variations, Part 5: The Complementary Zen,” Oct. ‘03 audioXpress .
- Thagard, Norman, and Pass, Nelson, “Build the A75 Amplifier,” Audio Amateur 4/92 and 1/93.
- The Unofficial Dynaco Home Page
- marchandelec.com/ftp/Dynaco-400-Rebuild.pdf
============