|
|
Here’s a brief guide to constructing your own enclosures and cabinets.
Many of the projects outlined in the DIY community require a chassis or enclosure for a professional appearance. Unfortunately, in some cases the cost of such a chassis or enclosure can substantially add to the cost of a project. If you have seen some of my past articles, you know that I tend to make use of what’s available.
I will share with you a variety of techniques developed over the years to allow you to produce a professional, functional, and inexpensive custom chassis or enclosure for your next project. I will consider three chassis groups: first, a chassis that you can salvage from other projects and repair; second, a simple, sturdy and attractive chassis that virtually anyone can build with just a few hand tools; and, third, a more complex version that requires at least a few power tools and some precision to complete. I am an amateur woodworker and have—through the years—become an acceptable metal-worker.
TOOLS NEEDED:
• Drill/drill driver and assorted small sharp drill bits
• Countersink bit
• Assorted hole punches (for mild steel) or bimetal hole saws (for acrylic and aluminum (and mild steel, if you are very careful) (½”, ¾”, 1”, 1 1/8”)
• Acrylic hook scribe for cutting acrylic
• Hand saw or hand miter box, or ideally a table saw with 60+ tool sharp carbide blade
• Air brad gun or small nails, clamps (one web clamp will do for most chassis), and pilot bit to pre-drill holes in hardwood (if you don’t have an air brad gun)
MAKING DO
The first group of items may include old tube equipment chassis that were stripped for parts or transformers. I never (well, almost never) throw anything away, but I do have a well-organized junk room, which is the first place I go when I want to start a project. I evaluate what I need for a chassis or an enclosure, hoping to find one that will work with few modifications, before I decide to build or buy (Heaven forbid) a new one. I spend time in surplus outlets and places such as Goodwill searching for gear that may be useful later on.
The old-style Pilot amplifier started life as a commercial rack-mount telephone amplifier using four pin tubes. After stripping it of all parts, I spent some time figuring Out how to make the best use of the original chassis holes while allowing additional new ones. Place all major top-mounted parts on the candidate (include tube sockets and can caps, as well as trans formers) and move things around to find a pleasing look. In some cases you will be able to mount transformers, caps, and chokes under the chassis, so consider this also.
Don’t be afraid to arrange things in an unconventional manner; just try to keep parts such as preamp tubes and low-level circuits away from trans formers. I have one amplifier that has a V arrangement for tubes, and everyone who sees it thinks it is very unusual (not sure whether that is good or bad).
During the course of building Christie LM 12 IC Amp, which included an excellent discussion on building enclosures for these amps, I decided to use a really cool chassis that had been the power supply for a home-built pulse laser (I bought it at a surplus store, which had bought the estate). I coveted the two very heavy 60V center-tapped trans formers and capacitor banks. It also included a multitude of relays, big bridge rectifiers, switches, and heatsinks and was made out of heavy aluminum angle and plate.
I used one of the transformers for another project, sold the other one (paying for my whole purchase), salvaged the other parts, and left the capacitors on the chassis. Some careful measurements demonstrated that the parts, heatsinks, and boards would fit, and would provide a very unusual-looking amplifier (Photo 1). I cut Plexiglas for the tops and bottoms. I really like acrylics, because they are easy to work with and can be very visual (more about this later).
HALF-BAKED
The second category includes items, such as cake pans, that were designed for something else, but can be made to serve a new purpose. I once used a cake pan for a chassis, when I was 13 years old, but got so much grief for it, I never did it again. (Mom was a little upset that I used “her” cake pan and my friends laughed at me.) Some builders commend them as cheap, Sturdy, and attractive, but I just think they look like cake pans. If you use cake pans, don’t take offense; instead apply some of the suggestions in this article to build a quality, good-looking, and budget friendly chassis. Believe me, this will save you a ton of grief when your “cake pan” overshadows your wonderful project.
If you haunt surplus stores, you will find a wide variety of chassis and en closures—many of them industrial or military surplus, containing a selection of cool parts and usually a very rugged chassis. It is quite easy to fashion a new aluminum front and back panel to cover existing holes (more on working with aluminum later). I see tons of re ally nice rack-mount equipment originally designed for phone/CAT 5 junction boxes and servers. These are great for tube amps because most of the top and bottom panels are solid and relatively hole free. Again, you make a new front and rear panel and you are good to go.
This also makes a pretty good environmental statement. I recently wanted to write an article on building an inexpensive PP tube amp (less than $150 for everything) that would be easy and inexpensive to maintain and re-tube. My first stop was eBay, where I picked up a nice set of power and output transformers from a Harman Kardon 300 integrated amp ($62 including shipping). I used almost half of my budget, so it was time to find a very inexpensive chassis (Photo 2). I was in Gateway Electronics in St. Louis and found three enclosures used for serial and parallel port printer switching. They were 10” x 6” x 1½”, beige powder coated (one of my favorite finishes), and the front switch and back sockets were already removed. These were marked $4, so I bought all three.
I laid the major components Out on the cover of one of these and decided I could make it work. I found an appropriate size pilot light for the existing front hole, drilled the rest I needed, and then cut a couple pieces of aluminum to cover two of the three back slots and then used a barrier strip to cover the last one. I also used a piece of scrap angle aluminum underneath, to stiffen the top of the chassis.
Before I go any further, a word about aluminum. I really like working with aluminum—it is easy to work, drill, and machine, looks good, and can be finished in a variety of ways. The best place to find sheet aluminum is at metal recyclers. They often have racks of it for sale.
The price is usually by the pound, and you can buy many scraps for very little money. Even if they don’t have a display of this type of stuff, be very nice to the counter person and explain what you are looking for (flat sheets, angle, and so on) and ask whether there is any place you can look for it. My experience is 90% of the time they will send you to the scrap area for aluminum and you can freely pick what you want. If it has some scratches or corrosion, don’t worry—I will also talk about that later.
I recently walked into one of my usual places, where the counter guy had saved some “nice stuff” for me. He had four sheets of 1/8” plate about 2’ by 2’ with one side covered in white plastic. This is really high-rent material! The plastic protects the satin or brushed finish and makes a great canvas for your layout. I paid about 8 bucks a sheet, and later you will see the use of some of this. Obviously, I thanked him profusely. I try to have a variety of thin and thicker material on hand, as well as some “angle” aluminum (I figure that if I die suddenly, my wife can always sell it as scrap).
If you can’t find any recyclers close by, most large home stores or hardware stores have a “metals” rack containing steel aluminum, brass in sheets, angles, tubes, and squares. This is obviously more expensive, but it is usually new and in good condition, which may re quire less work in the long run. Keep in mind that your finished product will still cost only 10-30% of a pre-manufactured enclosure.
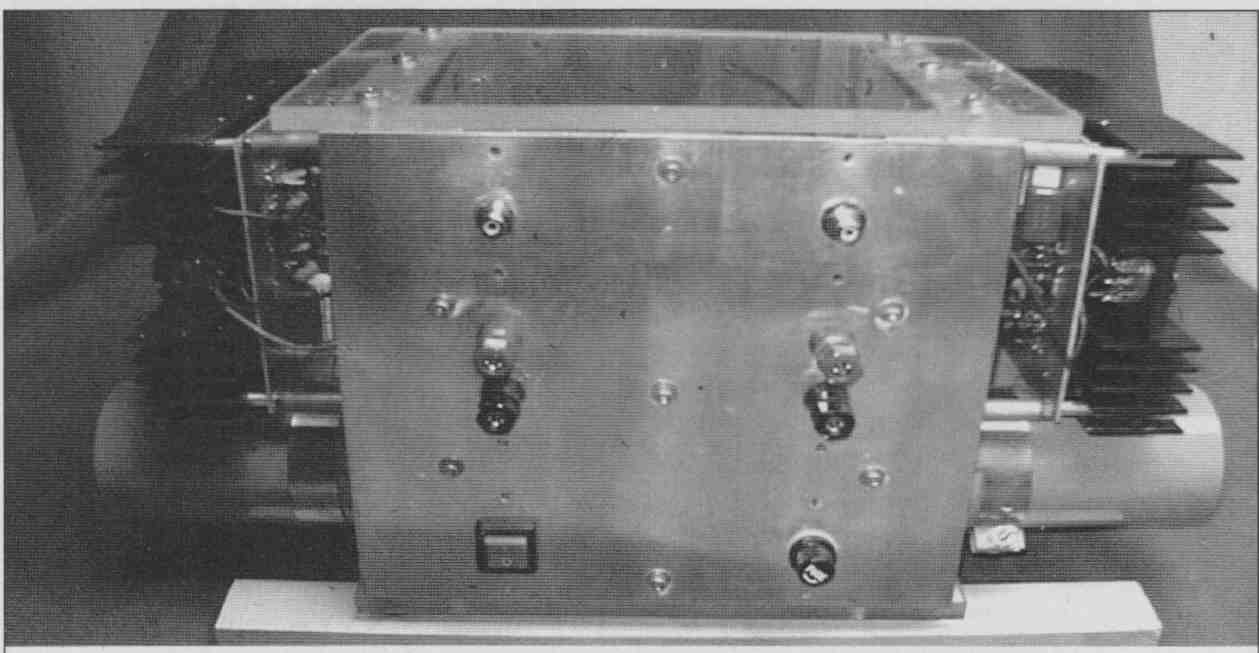
PHOTO 1: Aluminum castle
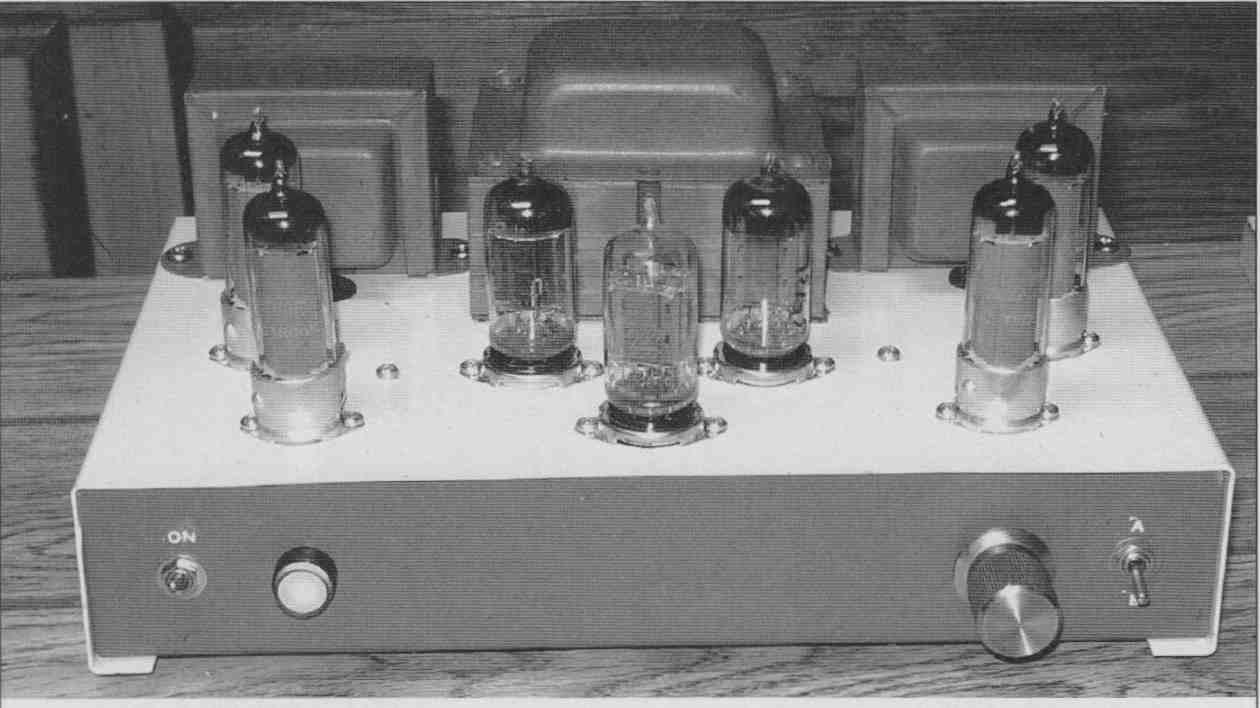
PHOTO 2: Complete amp.
FROM SCRATCH
I have mostly taken existing parts and modified them to work, but you can also build some custom gear using some very helpful tools. While you can build some gear with hand tools, you should invest in a table saw—even a tabletop model—which you can purchase for $150-300. I had a Makita 10” tabletop model for many years (since upgraded). Or, you might get some help from one of your friends with a saw. You will be cutting wood, acrylic, and aluminum, so you will need 60+ tooth quality carbide-tipped blade. Don’t scrimp; a good blade can be re-sharpened 6-8 times (cost is usually about $15-20 per sharpening).
Acrylic and wood make a great first chassis, because they are easy to work, even with just hand tools. You can buy 1” x 1” or 1” x 2” hardwood at any home improvement store and cut it with a hand miter box or hand saw to build the base of the chassis. The same process for the base is used for either an aluminum or acrylic top. The acrylic should be 1/8 to 1/4” thick, depending on the load that will be on it. It is available in a variety of colors, finishes, and thicknesses (search for "Plastics" in Google).
Most stores will usually cut pieces for you, and charge by the square foot or by the sheet. They use a tablesaw with a special (read: expensive) plastic cut ting blade that leaves a very nice edge. You can cut acrylic on a regular table saw, but if you don’t have one, you can buy an acrylic scribe (a sharpened hook used to scribe the acrylic, Photo 3).
Lay down a good metal rule and pull the scribe from one end to the other on the line you want to cut. Do this four to six times, applying more pressure on the subsequent passes. You should see a little continuous plastic curl coming up from the acrylic. The thicker the material, the more passes you should make.
Once you have cut a very strong groove, place the larger part of the piece with the groove up on a table or piece of wood with a sharp edge, align the groove over the edge of the table, and sharply hit the part hanging over with the palm of your hand. You should be rewarded with a sharp snap and a perfectly “cut” piece. Repeat this on the other edge for the size you want. It is very helpful to make your breaks with at least 2-3” hanging over the edge.
If you are using fairly thick material, you will want to sand the edges. Start with 100 grit and when you get a nice smooth edge, move to 200, repeat, then go to 400. If you want a really nice clear edge, use 800 and 1000 grits, and then use plastic polish. I very seldom go past 200 because I don’t care whether I have a clear edge.
This particular chassis (Photo 4) took me less than 15 minutes from start to finish. One of the side benefits of using acrylic for the top or front of a chassis or enclosure is that it forces you to be very careful in your wiring (after all, you don’t want everyone to see a rat’s nest).
MORE BOXES
You can make a very simple enclosure out of three pieces of hardwood and two pieces of acrylic (or two pieces of wood and three pieces of acrylic). I built many gain clone chip amps (Photo 5) for friends using a piece of hardwood (or acrylic) for the bottom and two pieces of hardwood for the ends. I then cut acrylic for the front and back, drilled screw holes into the wood, and in about 20 minutes built a very attractive enclosure.
A couple of notes about using acrylic: Don’t place it near heat (such as class A amp heatsink mounts) because it will bend and deform. Different kinds will take different amounts of heat with polycarb probably being the most heat resistant. Acrylic obviously doesn’t conduct electricity, provide a ground plane, or shielding, so you must be creative with those needs. For input connectors, you can drill large holes in the acrylic and mount an aluminum plate to the inside of the panel.
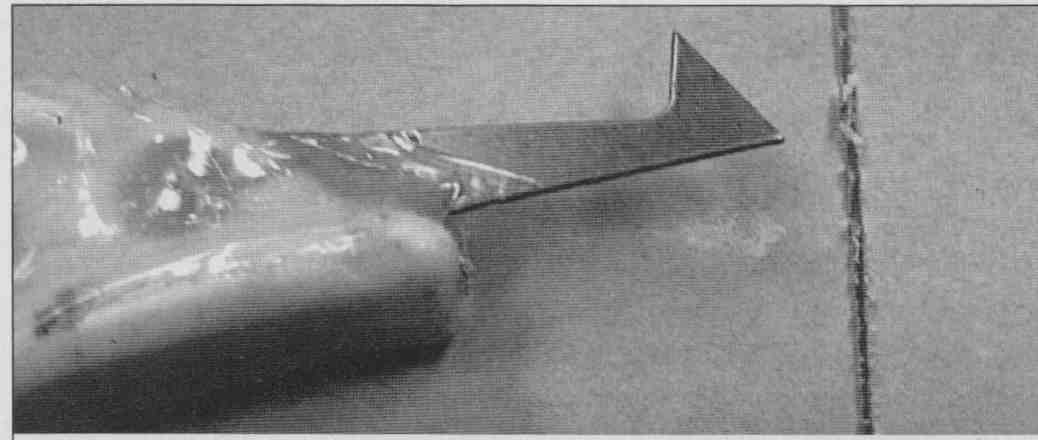
PHOTO 3 Acrylic hook.

PHOTO 4 Acrylic wood chassis
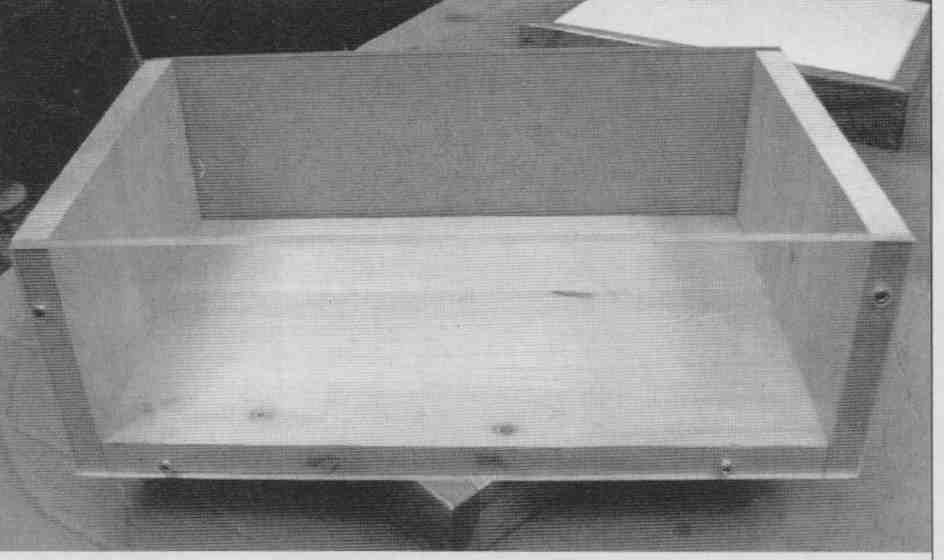
PHOTO 5: Gain clone amp case.
If you mount LEDs in acrylic, try just press fitting them rather than using commercial mounts. This will give you a lighted edge on the acrylic, providing a very nice visual effect. I typically use blue LEDs and recently found some aqua ones. I have seen other colors including violet, so you have several choices.
I built one amp for a friend with a thick acrylic base and clear front and back. He liked the blue edge on the front panel so much that he asked me whether I could incorporate LEDs into the other panels. I put two in the rear of the bottom panel and one on each side panel. He now has a glowing blue box in his living room and receives many favorable comments on it.
Traditional wood and metal chassis are also quite easy to build, and you can make them any size you need. When building the base for the chassis, you can use either miter joints or butt joints. Pick through your wood supply to find the best grain, and use this for the front of the base. Your front and back pieces need to be the exact same length, as do the sides.
Once everything is cut, you can glue-clamp the pieces together with a web clamp (Photo 6). It is a good idea to also use a couple of clamps to secure the box to a flat surface while the glue dries. You can also use a small square to check that the frame is square. I sometimes do my metal work and finish before I glue chassis together, and sometimes I don’t glue the back panel; instead I use two or four countersunk screws from the back into the side panels. For bigger chassis this allows better access to all corners.
Sand the base pieces with 100, then 180, and finally 400 grit paper. There are hundreds of “finish” products Out there. I like polyurethanes because of their durability and fast drying time. I also use Watco Danish wipe-on finish or Tung oil. Lay on a heavy coat with a foam brush, allow it to soak in for about 15-20 minutes, and then wipe off the excess with a paper towel. Allow to dry for several hours, then lightly sand with 400 grit paper between coats. Repeat the process until you get the gloss or finish you are looking for.
For boxes that mount the panel on the top, you will need to attach the top to the base. The process from here is pretty much the same whether you are using acrylic, mild steel, or aluminum for the top. Start by drilling a series around the perimeter of the top, about 1/4” in from the outside edge. (I generally put a screw in about 1” from each corner and then space a few others between them.) If you are using acrylic or aluminum, you may want to countersink the screw heads. For acrylic I use brass #4 square drive production screws with a 5/64 pilot hole and a 7/64 hole in the top plate.
For aluminum or steel I use #6 round-head machine screws with a 3/32 pilot hole and a 9/64 shank hole.
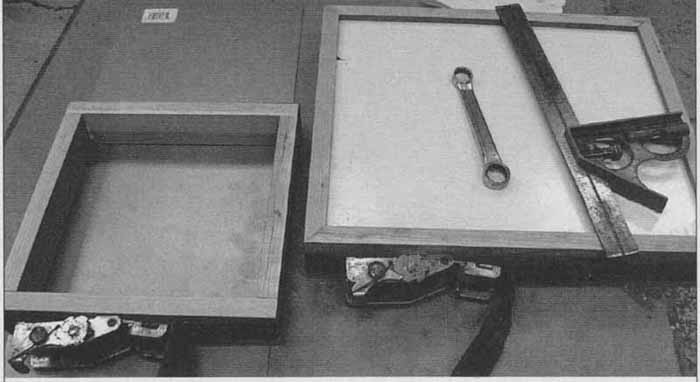
PHOTO 6: Boxes being clamped.
If you are using heavy aluminum for the top, you can also countersink them. The best way to buy screws is by the box of 100 (save money), or order them from McFeely’s (McFeeleys.com). Once this is all done, you can take the top off and cut and drill the necessary holes for your component.
You can make a little fancier version of this type of chassis by using miter corners and a recessed panel (Photo 7), which requires more work. Your front, back, and side rails are “grooved” for the metal or acrylic. You will need a tablesaw, setting the fence for 1%” below the height of the base. Set the blade height about 1 and run the back side of the front, back, and sides through the saw. If your panel is thicker than the cut, move your fence on the saw a little, and run them through again.
Once you have the top panel machined and punched, you can use a variety of finishes (Photo 8). Steel is easy to paint with a spray can. Rustoleum makes some very nice textured and antique veined finishes. Clean the surface well with lacquer thinner and spray several light coats (or as directed on the can) and then let dry for 24 hours. Then heat the oven to 250° and place the panel on the rack, close the door, and turn off the oven. This baking will make the finish tougher.
My favorite finish on steel is powder coating, which you can do at home (eastwood.com), but I have a local shop that does it for me. They are very reasonable, especially if I am in no hurry and can wait until they are using the same color on many other pieces. Powder coat is so tough that it is virtually impervious to chipping, wear, and corrosion. You can also do other parts including transformer bells and choose almost any color for your amp.
WORKING WITH ALUMINUM
Aluminum panels present another challenge. If you have used material, it will no doubt have a variety of scratches and abrasions. The simplest way to deal with this is to sand starting with 80 or 100 grit paper and proceed to finer grades to achieve the finish you desire. If you use an orbital sander, you will get small circles, which diminish in size with each grade of finer paper. If you don’t want these circles, hand- sand with a block of wood backing the paper Another interesting finish is called an “engine turned” finish, which you see in very high-end, vintage car dashes and trim. This requires a drill press and small steel bristle brushes, as well as a great deal of time to build a jig to hold and move the panel for overlapping circles. I recently did a very large panel with a 1” steel bristle brush designed for wire brushing metal. This wasn’t as time consuming because it used a 1” brush; each overlap was ½”.
Photo 9 shows the setup to do this. It requires that you have some way to guide your metal panel through a straight line. I set the depth range stop on my drill press so that each depression cut is the same depth. You can do the overlaps on the length visually, and move the table to the next row each time you finish a row.
Aluminum requires no cutting abrasive be used on the steel brush, but if you are going to do this to mild steel, you will need to apply a paste of silicon carbide and oil on the brush periodically. You can purchase a brush at virtually any hardware store, and small brushes (with compounds) from Brownells (Brownells.com), which is a gunsmithing supply store in Montezuma, Iowa, carrying tons of re ally neat tools including metal coloring solutions and chemicals.
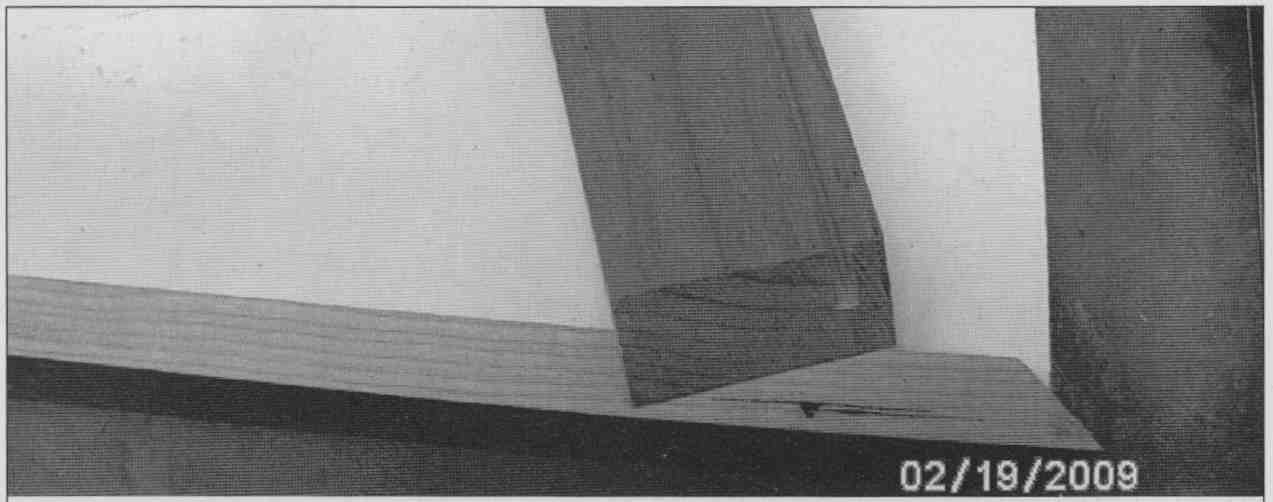
PHOTO 7: Recessed mitre joint
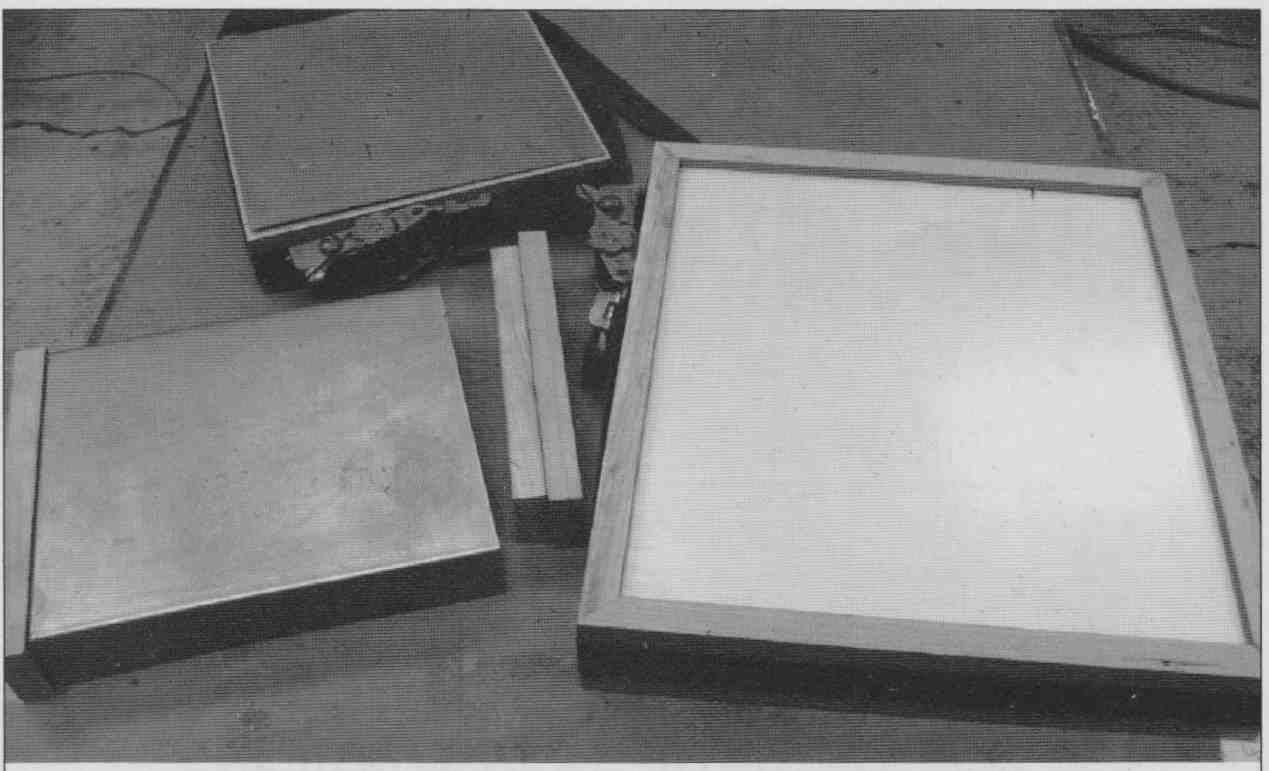
PHOTO 8: Three completed chassis.
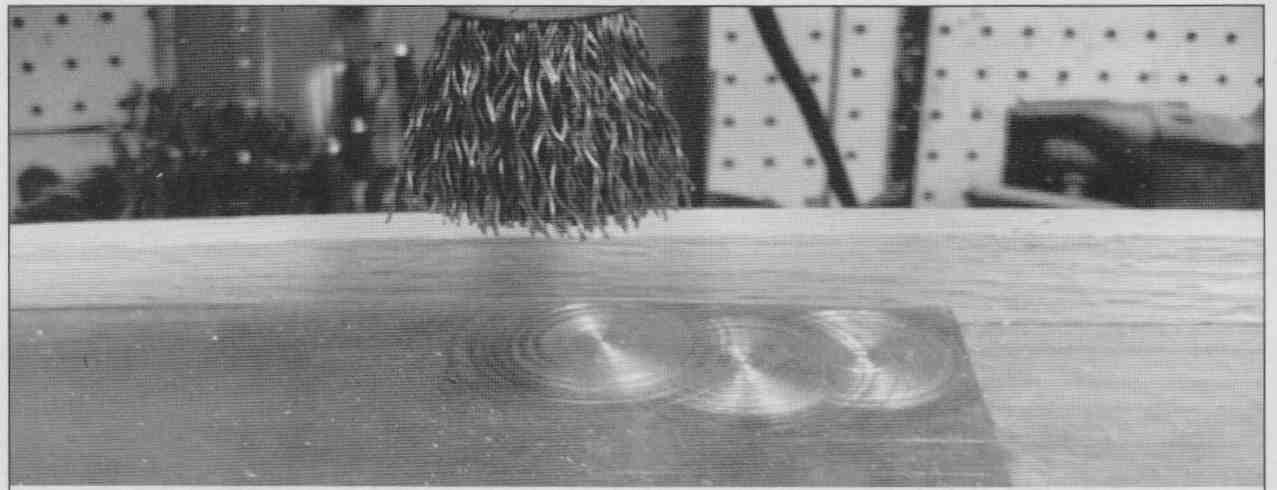
PHOTO 9: Turning setup.
Graham Dicker previously discussed another type of chassis using C channel. I haven’t found a good source for C channel, so I make my own steel C channels, with a small sheet metal brake (www. harborfreight.com). This is an inexpensive tabletop version of a brake you will find in a large sheet metal shop. If you don’t want to buy a brake, you can sometimes get a heating and air conditioning shop to bend the metal for you. The rest of the construction is just making your end panels from the wood strips you used above. The only difference is you need to have two that are dimensionally smaller glued to the external pieces, for attachment to the channel.
The last type of chassis/enclosure I discuss is all aluminum. For this type of construction you really must have access to a tablesaw with a 60+ tooth sharp carbide blade. You can use any fine tooth carbide wood blade to cut aluminum. It is extremely important that you be very careful! I know this sounds crazy, but I cut heatsinks up to 5” thick with my tablesaw in addition to the angle and sheet used in this construction.
CUTTING METAL ON A TABLESAW
1. Always wear eye, ear, and hand protection when using any power equipment. I know this sounds obsessive, but a small piece of aluminum can blind you, or at least involve a trip to the ophthalmologist. I wear prescription shop glasses made with polycarb lenses with eye wings on the sides. They are expensive, but you have only one set of eyes! For hand protection I wear a set of Mechanix gloves, which are avail able in most hardware automotive parts stores and home improvement stores. Buy a good pair that fit tight and have reinforced palms. A good pair of these will not only protect your hands, but still offer good tactile feel.
2. If you are cutting channel or angle, have the openings resting on the bed of the saw; do not attempt to cut angle material with either one of the edges facing up Most of the time this will not cause a problem, but if you ever have an edge catch a blade at the wrong angle, you may have a piece of aluminum traveling at 60 plus miles an hour flying in your shop.
3. Make sure you have no distractions. My dogs go most everywhere with me, but they are not allowed in my shop (three 75 lb. labs can get into a lot of trouble).
4. When you have everything set up, turn on the saw and let the motor come to speed before feeding any material, and as soon as you are done with your cuts (before you reach for scraps of material), turn off the saw and make sure the blade has completely stopped.
5. NEVER, NEVER attempt to cut steel with a tablesaw!
You can easily build a complete enclosure for amplifiers that use heatsinks. Start by laying the heat- sinks on each side of the components you are going to use. You need to calculate how much space you want between components and move things around until you get it right.
Now you can measure from the proposed attachment points on the heatsinks to establish the length of the angle aluminum you need. I use heavy ½” x ½” angle aluminum, but for very heavy stuff you can use the 1” x 1” material. Ideally you will cut four pieces to this exact length.
In this case, I was very lucky in that the manufacture of these heatsinks included “screw slots.” If you don’t have these, you will need to drill the angle and heatsink and then tap the heat- sink for a bolt. I have a drill, die, and tap set that provides 4-40, 6-32, 8-32, and 10-28 sets (available from hobby and model stores and micromark.com). Precision is the key here; clamp the angle firmly to the heatsink, drill the hole, tap the heat-sink, and then drill a slightly larger hole in the panel and countersink the head (Photo 10).
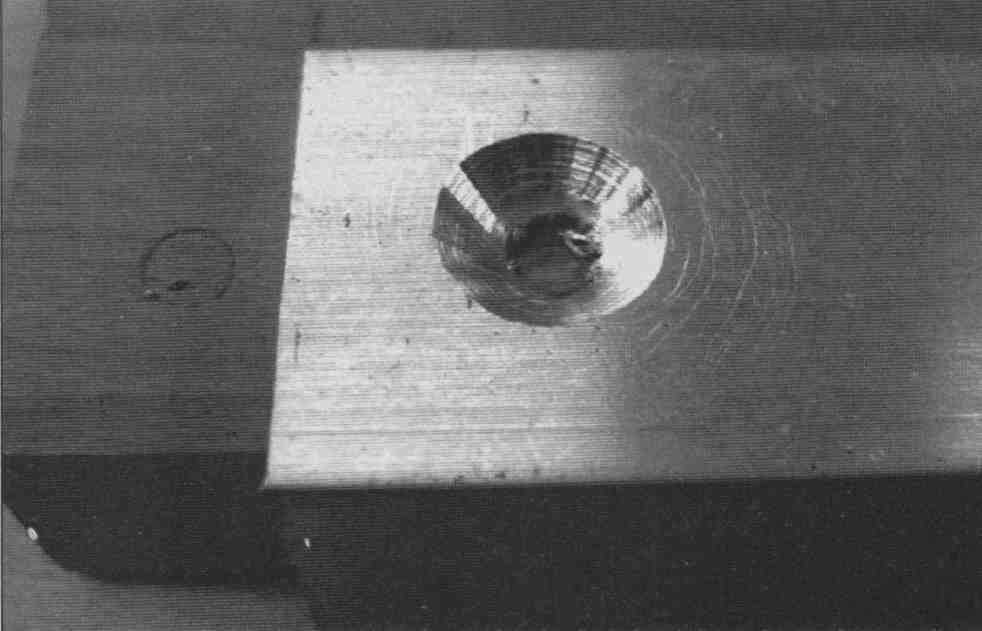
above: PHOTO 10: Countersunk hole.
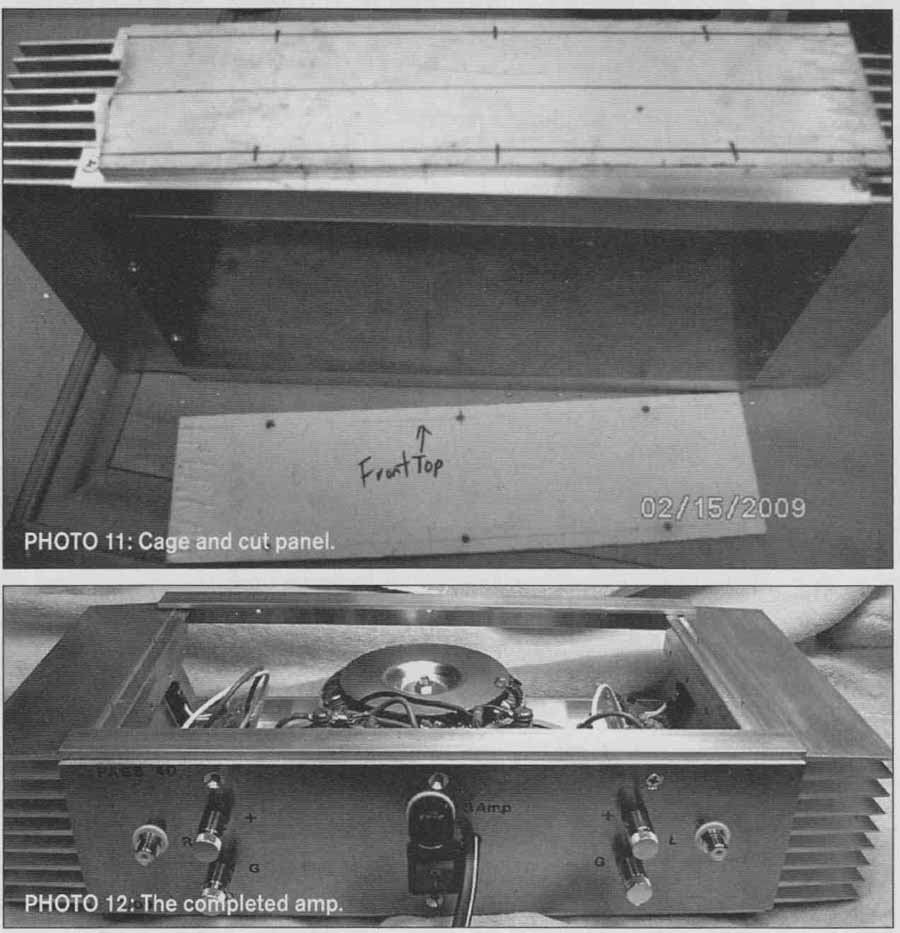
above: Photo 11 and Photo 12
Once you have all four in place, it’s time to make the front and back panels. First check the squareness of your panel material (no matter how well your saw is set up, if the material isn’t square the resulting panel won’t be perfectly true). Cut your panel based on the squarest edge or by using your miter gauge to cut a true edge (Photo 11).
After you make the panels, it is a good idea to clean up the edges. I use an orbital sander with 80 grit paper to remove the cutting marks from the edge and follow with 100 grit for a matte finish. You can obviously move to finer and finer grades of paper and continue up to a polished edge.
Now clamp the panels to the chassis cage and drill holes for mounting through the front and rear panels. You can use panel head screws, or countersink them, but I prefer to use more decorative bolts for the front panel. I use black or chrome Allen head bolts, which add a special touch to the panels and are pretty inexpensive. You will notice that I have left the plastic covering on the panels for this chassis; they make great layout canvas, are easy to drill through, and protect the finish until I am ready for the final mounting of jacks, switches, pilot lights, and so on. The finished amp is shown in Photo 12.
Well, you now know all my tricks. Feel free to experiment and try different types of materials and finishes.
= = = =