By Homer L. Davidson
Today, there are many different kinds of cabinets that can be used to enclose your favorite electronic project. They are available at reasonable prices, in various sizes and shapes, (Figure 1) from numerous electronic parts suppliers.
Small projects are usually built in plastic cases, since they are easier to drill and otherwise adapt to the project. Large electronic projects, however, may be enclosed in large plastic, metal or a combination plastic and metal cabinet.
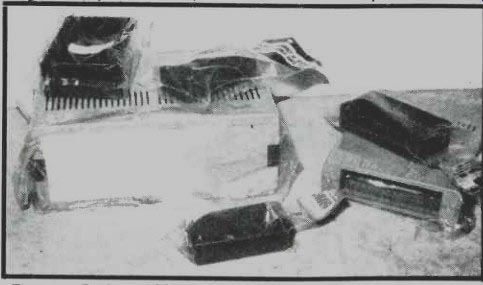
Figure 1: Project cabinets and enclosures come in many sizes and shapes.
Plastic, metal front panels and plastic sides and all metal cabinets.
A Touch of "Class"
Unfortunately, we often take the easy way out by purchasing a cheap plastic case. If you take a little extra time and select a metal or a plastic case with a metal front cover, the project can look like a commercially constructed unit. It's amazing how a polished aluminum front panel dresses up an electronic project. Just add a few decals, letters and numbers and you are in business, you have a finished project that you can be proud to show your friends (Figure 2).
Choosing The Cabinet
When choosing a good cabinet, a good rule of thumb is to spend as much for the cabinet as the total cost of the project. This may sound a little steep, but in the long run you end up with a professional looking project. Select a cabinet that is large enough to hold all components without stacking them on top of one another. Sometimes when the parts are all jammed to ether, you end up with shorted components that provide unreliable and/or intermittent operation.
(Figure 3). Make sure the cabinet is shock proof. Do not choose a plastic cabinet when real high voltage or power line shock hazards are built in. Do not choose a plastic cabinet for electronic projects that may have RF radiation, such as generators or high voltage test equipment. Keep battery operated projects in the plastic cabinets.
Choose a metal or metal front cabinet for a professional appearance. Plastic cabinets with aluminum thick front panels are easy to drill and make a finished project look good. Admittedly, they cost a few more bucks, but they are worth it. In choosing a cabinet for your favorite project, make sure it's big enough. Take a peek inside a commercial test instrument and note all the room around the various components (Figure 4). Next, choose a cabinet that is safe and shock proof. Last, choose a cabinet with a professional looking finish. It's worth it!
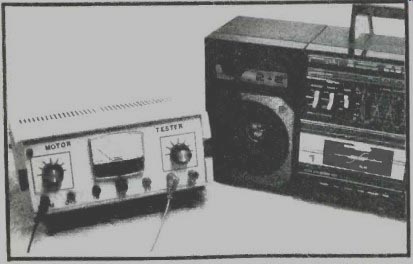
Figure 2: Dress up that front panel and make it look professional with
decals, rub-on letters and numbers. Here the test instrument case has a
plastic body with satin finish metal front panel.
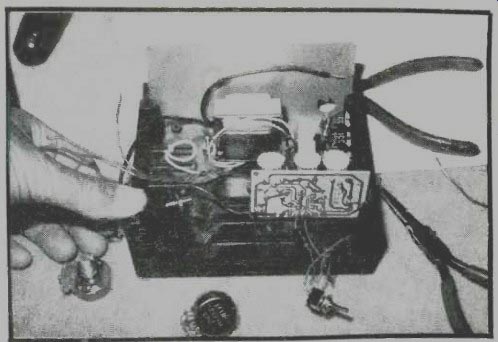
Figure 3: Select a cabinet big enough for all parts. Here pmts are jammed
together in a project case that is too small.
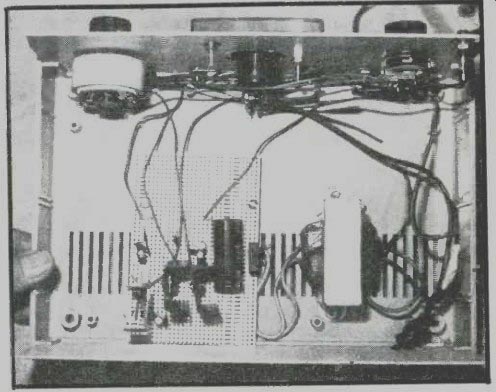
Figure 4: This cabinet is large with plenty of room around the components
and plastic standoffs to mount the pc board.
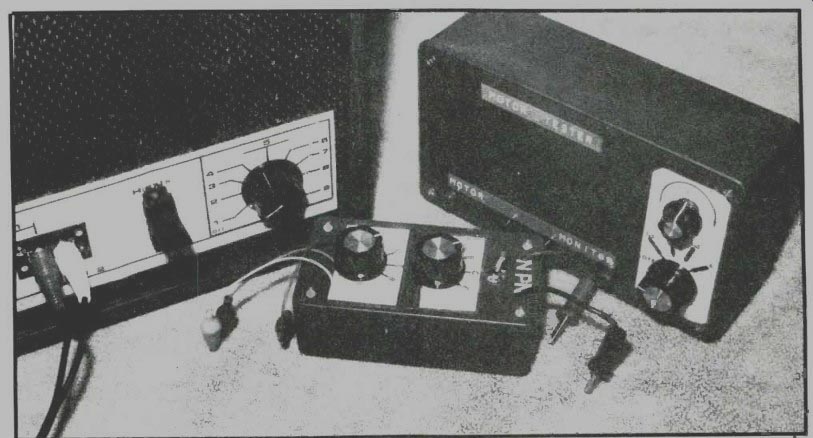
Figure 5: Plastic project cases may come with metal or plastic front covers.
Plastic Cabinets
The plastic cabinets are usually cheap, easy to work with and frequently electronic suppliers nave them for sale. Plastic cases and boxes come in sizes from 2 1/4 inches up to 8 inches in length. Some of the plastic enclosures have metal aluminum covers, while others have screw mounted plastic covers (Figure 5). You will find some plastic boxes with internal slots for mounting a pc board.
Figure 6: With this ABS plastic cabinet, a metal satin-aluminum front panel
was purchased extra for one dollar.
The typical cabinet is low in price, can be drilled or large holes can be cut to make a quick project. Select the plastic high-style pro case for projects like RF or infrared transistors, garage door transmitters or any RF project. Some of these deluxe plastic enclosures are made of polycarbonate material which is impact resistant and can be dropped without breaking.
The deluxe plastic case may come in two sections where the top half lifts off and is bolted to the bottom section. Some are made for special test instrument enclosures. They are flame retardant and come in a variety of different colors. The ABS instrument enclosures have front and rear matching panels.
Integral pc board mounting standoffs and two sets of vertical mounting slots for front and rear subpanel pc boards are provided.
For a dollar bill you can purchase a satin finish aluminum front panel that gives your project the professional touch (Figure 6). This panel is easy to drill and parts mount solidly on the front panel. When the switch or control clicks on you know it's solid, and the parts will stay in place. Nothing dresses up the cabinet more than a satin aluminum finished panel.
Metal Cabinets
Although metal cabinets or enclosures may be more difficult to work with, and may take a little longer to put together, they give a professional finished appearance. Metal cabinets come in pressed, cast and bent metal units (Figure 7). The metal enclosure may have plastic sides and metal front and back panels. Of course, the metal cabinet also costs more than any other cabinet.
Figure 7: This large metal grey painted cabinet comes with plastic ends
and feet.
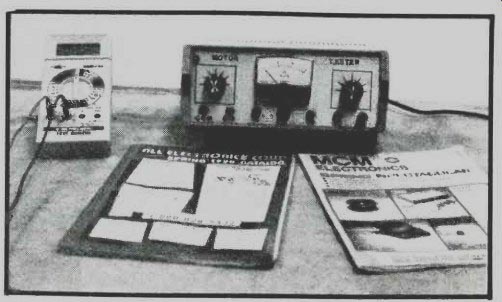
Figure 8: You can order out manufactured test instrument enclosures, just
like the commercial test instruments from Global Specialties and Elenco
Electronics.
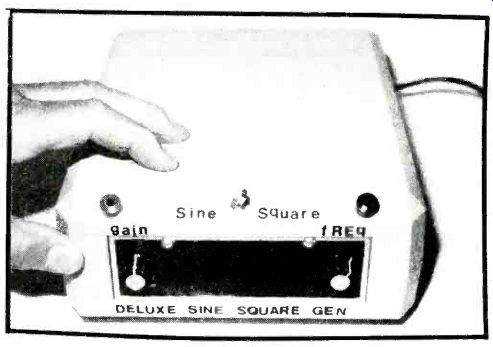
Figure 9: You can pick up surplus cabinets from $1 to $5.00. Some have
colored plastic cabinets with a few control holes stamped in them.
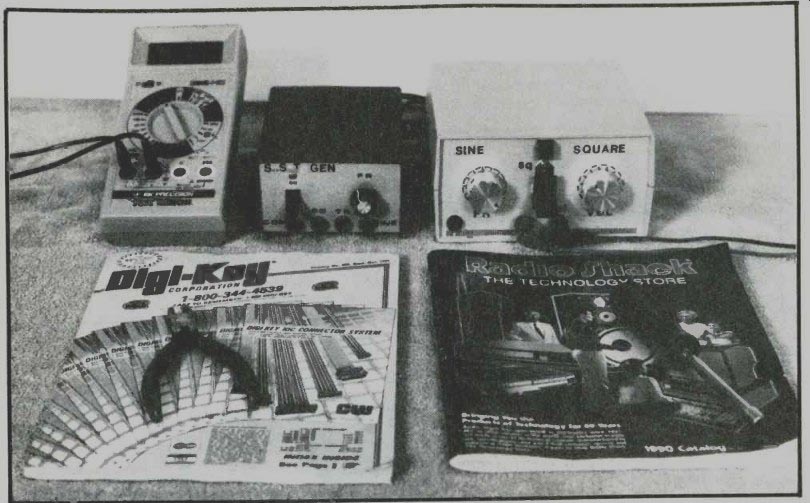
Figure 10: Dress up the front panel with decals or rub-on letters and lines.
Prepare the front panel, drill, mark and spray on clear art spray to prevent
scratches.
The first metal cabinets had a black crinkled finish. Some still do. It may appear with a slanted front, recessed front panel, desk top console and/or a perforated cabinet. We recommend a metal cabinet for your favorite test instrument. Not only do they have a professional appearance, they stand up longer and are quite durable.
Test Instrument Cabinets
Commercial test instrument cabinets may be purchased from some test equipment manufacturers. Many of these cabinets are exact units that the manufacturer uses for their test instruments. Some cabinets have plastic cases with satin aluminum front panels, while others have a solid aluminum brush anodized finish, front and back panels included. Small grey plastic impact probe cases are available. Both Global Specialties and Elenco Electronics have project cabinets at fairly reasonable prices (Figure 8).
Surplus Cabinets
Brand new cabinets with a few blemishes may be purchased in the surplus electronic parts market. You can pick up project boxes or factory enclosures for only a few dollars (a fraction of their original value). Of course, many of these cabinets were designed for manufactured test instruments and electronic projects. Some cabinets have smoked gray dizels, that will show up LED's or pilot lights, when mounted behind the front panel (Figure 9). A lot of the cabinets have control mounting holes. You can usually purchase these surplus cabinets from $1.00 to $5.00 each.
Figure 11: Lay out the switch and control decals with rub-on lines found
at electronic part stores. These are the same lines and numbers found in
pc board layout kits. Make a few different ones and copy what you want or
need on a photocopy machine.
Letter and number the front panel with rub-on letters and numbers, that come in black or white to show up nicely on dark or black cabinets.
Layout--The Front Panel
Before drilling the new cabinet, lay out the front panel on a piece of white typing paper. Make a rough sketch where each control or component will stick through the front panel. Center and balance up each hole with a ruler. Mark cross ("X") where each hole will go.. Scotch tape the layout sheet over the front panel. This will help prevent scratching and marring the satin aluminum and plastic finish. No matter how careful you are in drilling the cabinet, scratches often appear.
Drilling The Cabinet
Start with a 1/8 inch drill when starting holes in the front cabinet. Then enlarge the hole with a larger drill bit. Sometimes when starting with a large drill bit it may leave a ragged hole or pull the cabinet out of your hands. The cabinet or front panel may run up the drill bit and whirl around dangerously, if not held securely while drilling.
A drill press is ideal for all cabinets and front piece drilling. Use a block of wood covered with a cloth to drill those slick finished front panels. After drilling a couple of holes, tap the panel to dislodge small metal pieces that may mar the front panel. Of course, a hand drill will do a nice job but hold the cabinet or front panel securely when drilling. Plastic and metal enclosures have a tendency to spin up the drill bit when it completes the penetration.
Dress Up the Front Panel
Make that front panel look like a commercially manufactured unit by dressing up the front panel. Letter all components with rub-on transfer lettering.
You can purchase small, medium and large letters, with numbers, for any front panel. Pick them up at electronic wholesale parts houses, stationery, hobby and art stores. They come in plastic sheets. Prepare the front panel before mounting any parts.
Make those dial decals out of direct etching dry transfer lines and numbers. Black solid transfer lines can be placed directly upon the aluminum or plastic front panel. Variable control decals can be made up directly on the metal surface. Use a razor blade to trim the ends squarely. Rub on numbers can be placed on the control decal (Figure 10). These control decals can be placed on a white piece of typing paper and copied with a photocopy machine. Likewise, decals found in various electronic magazines can be copied and glued on the front panel.
Keep all numbers and letters as square as possible.
Keep lettering in line by lightly drawing a horizontal pencil line or a layer of scotch tape. Seat the "rub on" numbers and letters up to the line or tape edge to keep them level. After the front panel is completed, spray on 3 or 4 coats of clear art coat finish. This prevents damage to the lettering and protects the front panel (Figure 11). Now, mount those front controls and meters.
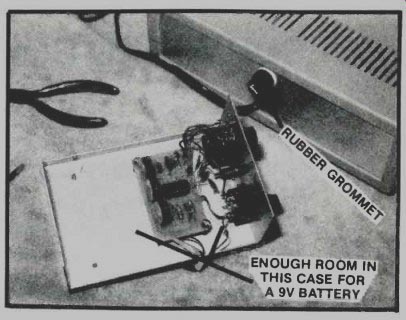
Figure 12: Place rubber grommets in metal or plastic holes for power cords.
Prevent shorts and shocks with grommets.
Conclusion
Here are some constructive hints that may make project building a lot easier and a lot more fun. When choosing the right cabinet, make sure you have plenty of room to mount those parts. Dress up your project with a nice cabinet or enclosure. Start all holes with a small drill bit. Prepare the front panel with a sheet of typing paper scotch-taped to the front panel. Use extreme care when drilling or mounting parts on the front panel to prevent nicks and scratch marks.
Dress up that front panel with rub-on letters and numbers. Finish the front panel "dress-up" after drilling all holes and before mounting parts. Spray several coats of clear finish on the front panel for protection. Place rubber grommets in holes where power cords come through metal or plastic (Figure 12). Play it safe and shock proof. Mount plastic or rubber feet on the finished project. Above all, make your project shine and look professional--it's worth it.
Also see: Link |
adapted from: Electronics Handbook 1992