Learn how to use the commercial manufacturing process for PC boards at home.
By WILLIAM ALFORD
THERE ARE MANY TECHNIQUES available for making PC boards, ranging from exposing UV-sensitive resist coated boards to the use of heat-fused toner from copy machines. However, most of those techniques are economical only for hobbyists and small commercial prototype runs. The industrial process of choice for producing PC boards rapidly and cheaply is to print the circuit pattern onto the copper-clad board using a screen-printing process. This technique is so fundamental to the commercial manufacturing process that all serious hobbyists, students, and engineers should at least be familiar with it. Once, educated to its possibilities, they might find it to be a valuable tool in their own electronic projects.
In the screen-printing process, etchant resist is forced by a rubber squeegee through the open image area of a fine-mesh stretched stainless steel screen onto the PC board below. A blocking agent applied to the mesh in a pattern prevents the resist from passing through to areas of the substrate that are to be removed. This same process, a derivative of silk screening, can be used to label instrument panels and other flat surfaces.
Today's screen printing technology is an exacting scientific process. Instead of using silk screens stretched onto wooden frames, precisely made synthetic fabrics (or stainless steel screens) are stretched by pneumatic tensioning devices onto rigid aluminum frames. Stencil images are reproduced photographically on printing plates that can print images with resolutions to 2 mils on computer-controlled presses.
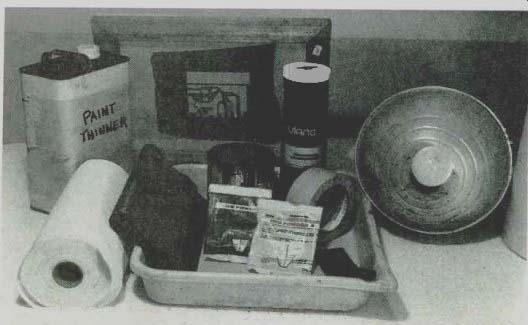
FIG. 1--THIS IS EVERYTHING YOU NEED to produce high-quality mass-produced
PC boards.
However, as sophisticated as today's screen printing industry is, the basic process itself is wonderfully simple, easy to correct, and uses readily available materials.
While it's true that screen printing is best for mass-production, and there are no real advantages to it if you need only one or two boards, it costs only pennies more to produce hundreds of the same board in a very short time. That process compares favorably to individually exposing, developing, and washing several boards with the photoresist method. Moreover, meticulous cleaning and careful handling of the boards prior to processing is unnecessary; cleaning is required only if some stain or corrosion might interfere with the etching process. Also, printed boards can be stored indefinitely for etching on demand, or they can be cleaned and reprinted with a different pattern. The printing screen itself can be saved as well for future runs of the same board, or can be reclaimed and used to print other circuit designs.

FIG. 2--THE FABRIC CAN BE STRETCHED and stapled to the frame by hand.
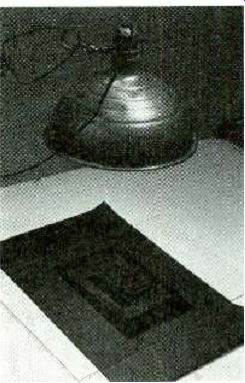
FIG. 3--A POSITIVE IMAGE is contact printed onto the stencil film
using a photo flood bulb. Note the black paper beneath the film to
prevent undercutting thin parts of the image.
Although you might think that all you'll ever need is one or two boards, you can never tell when that new electronic gadget you've invented might really be marketable--if you could only produce enough of them cheaply for the initial sales push.
Although today's inks and chemistries are much less hazardous than those used in the past, some of the products described in this article are both toxic and flammable and should only be used by trained persons in well-ventilated areas away from open flames. Figure 1 shows the materials that are used for this process. Protective gloves and clothing should be worn to prevent the chemicals from contacting the skin and eyes. Proper disposal of all waste materials in an environmentally responsible manner is crucial, just as with all other PC fabrication processes.
The printing process
The first step in the screen-printing process is to make the printing screen. Special polyester fabric is stretched onto a wooden frame and stapled in place. The fabric is classified by its mesh count; higher mesh counts provide greater print detail, but allow less ink to pass through during printing. For our purposes, a fabric of 160 to 180 threads per inch is a good choice. The fabric can be stretched and stapled by hand in much the same way as canvas is stretched for painting, as shown in Fig. 2. In fact, wooden canvas stretchers work well for light-duty use, and can be found at art-supply stores. Select a frame size that will allow a minimum two-inch clearance on all sides of the PC blank from the inside edges of the assembled frame. If canvas stretchers are to be used, the wood frame should be glued together with some good carpenter's glue, firmly clamped, and allowed to dry overnight before using it.
For more demanding, long-term use, the "cord and groove" method produces a tighter, more uniformly tensioned screen, which can easily be re-tensioned if necessary. With this method, a cord is hammered into a groove in the wooden frame to capture and stretch the fabric-in much the same way a window screen is installed in a frame. This more complicated method is explained in detail in the booklet that's available from the source mentioned in the side bar.
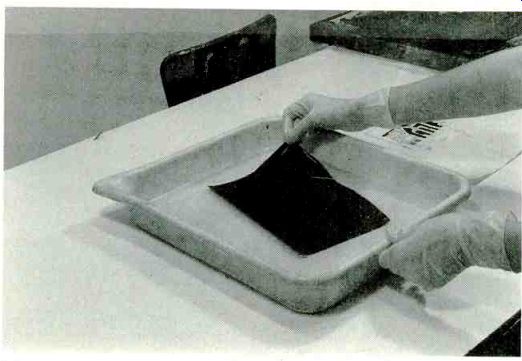
FIG. 4--DEVELOP THE EXPOSED STENCIL FILM in a tray of pre-mixed Ulano
A +B developer.
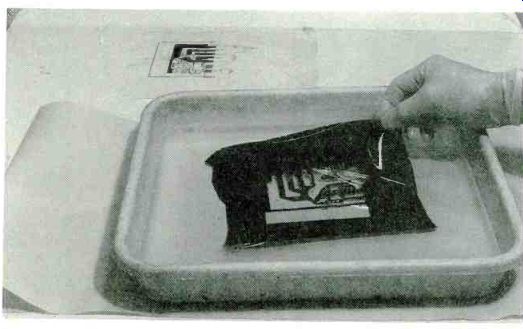
FIG. 5--WASH THE IMAGE OUT using warm water.
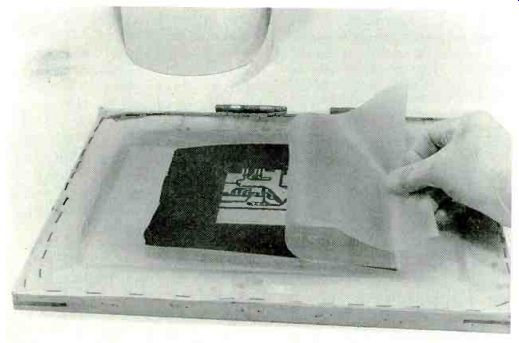
FIG. 6--WHEN COMPLETELY DRY, gently peel off the backing sheet from
the stencil.
There are many different ways to create the stencil image on the screen, but the easiest one for the beginner is the indirect film method. In that method, a piece of photo-sensitive stencil film is contact printed with the positive linage transparency, developed, and adhered to the screen. The exposure step is similar to that used in the photoresist method of PC-board fabrication. The light hardens the areas of the stencil film that it strikes, and the areas masked by the positive resist are washed away after developing. The author has had much experience with a line of screen-print materials from the Ulano Corporation, and their products are described in this article. The Ulano starter kits and their technical information packages contain detailed processing instructions. Although the company has a wide selection of stencil films, he used its Blue Poly-3 film for this project.
A light source with a high UV content is necessary to expose the stencil film properly. Black-light-fluorescent tubes, daylight temperature photo floods, or just plain sunlight works well for this. A 500-watt blue photo flood lamp can be obtained from camera or lighting supply stores, and will screw directly into a reflector light housing. Be sure to use a lamp with a ceramic socket since the heat from a 500-watt bulb will soon burn out other kinds of sockets and could become a shock or fire hazard.
To expose the stencil film, place it shiny side up on a smooth flat surface. It's best to place a piece of black paper beneath it to prevent reflected light from undercutting the thin parts of the image. Then place the positive wrong-reading over the film, secure two points with clear tape to prevent movement, and cover it with a heavy piece of plate glass. Use glass with rounded edges to prevent injury while handling it.
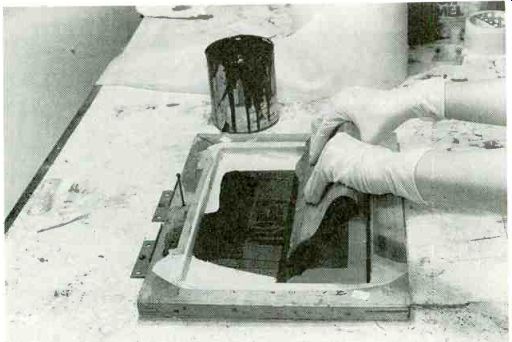
FIG. 7-PULL THE SQUEEGEE with a firm pressure across the image to
force ink through the stencil.
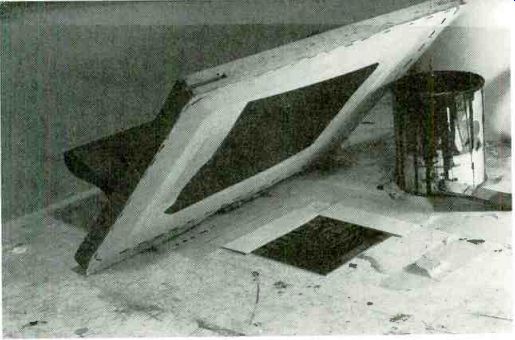
FIG. 8-PRINTED PC BOARD positioned beneath the screen image by the
register guides.
Position the light source directly over the center of the image at a distance of 20 to 24 inches (for the photo flood lamp) and expose it for 30 minutes as shown in Fig. 3.
Pre-mix the two-part developer according to the directions, and immerse the exposed stencil film in it for 90 seconds while rocking it with a gentle motion (see Fig. 4). Don't panic if you don't see an image appear at this time because it doesn't usually become visible until after the warm water wash.
After the 90 second development, drain the stencil and immediately place it in a tray of warm water at a temperature between 97 and 104 °F. Agitate the stencil by gently rocking the tray until the image begins to appear (see Fig. 5). Change the water frequently until no more blue color appears in the water and the image is clean and clear.
Applying gentle water spray with the stencil on an inclined surface in your work sink is an even better and much faster way. When washout is complete, transfer the stencil to a tray of cold water for a few minutes to harden the surface.
The Ulano developer must be mixed fresh every time you need it, although it will last 24 hours or so. Just be sure not to store it in a sealed container since it gives off a gas and the pressure could break a glass container.
Place the film shiny-side up on the screen fabric on the back side of the screen. Then blot the inside of the screen with newsprint (unprinted newspaper stock) until no more blue color emerges, or until it begins to stick to the screen.
------------
SCREEN PRINTING RESOURCES
Advance Process Supply 400 N. Noble Street Chicago, IL 60622 (312) 829-1400 Screen printing supplies
Atlas Screen Printing Supplies, Inc. 1733 N Milwaukee Avenue Chicago IL 60647 (312) 278-3565 (800) 621-4173
Screen printing supplies Naz-Dar Co. 1087 North Branch Street Chicago, IL 60622 (312) 943-8338 Ink manufacturers, Circuit Black #211 resist ink
Signplex
3747 Pine Lane
Bessemer, AL 35020
(800) 631-2360
Printed circuit screen kit
The Ulano Corporation
255 Butler Street
Brooklyn, NY 11217 (718) 237-3199-0616
Complete screen-making systems, Blue Poly-3 stencil film
Note: A kit of materials for screen printing 6 to 12 designs that includes fabric, a frame. squeegee, resist ink, stencil film and chemistry. and a detailed instruction booklet is available for $39.95 plus shipping and COD from Signplex. 1800-631-2360. Allow three weeks for delivery. Please add appropriate state and local tax.
A detailed booklet describing double-sided printing. a user-built vacuum table, advanced screen making and printing techniques, and more is available from Alford Enterprises, 9701 Bee Branch Road. Cottondale, AL 35453, for $14.95 plus $1.50 postage and handling. Send check or money order only. Please add appropriate state and local tax.
-------------
Air dry the screen until the stencil is a uniform, light, sky-blue color, and then gently peel off the backing sheet as shown in Fig. 6. A cold air stream from a fan will greatly speed the drying process.
Now tape the inside of the screen around the image with two-inch masking tape to prevent the resist ink from leaking through while printing, and affix the frame to your work table with small hinges so that it can be raised and lowered easily.
Locate a pre-cut, clean copper-clad board under the screen image area, and tape cardboard registration guides along the edges to position the rest of the printing run. Scrap pieces of blank circuit board material, strips of plastic, or any other rigid material can be used as register guides as long as they are no thicker than the blank you are printing on.
Gather all your support materials near you before you begin printing so that you will not have to interrupt the printing once you begin. Stopping the printing action for even a short length of time will allow the ink o begin drying in the screen image and necessitate a complete clean-up. Materials needed at hand include newsprint for proofs, tape to stop leaks should they occur, paper towels, and paint thinner (mineral spirits) to clean spills and mistakes.
Pour the resist ink above the image area and, holding the squeegee with both hands at about a 45 degree angle with respect to the table surface, pull firmly and smoothly toward you, as shown in Fig. 7. After printing, lift the screen to remove the board and insert a new one. It's best to do a few practice pulls on paper until you get the hang of it and begin to get good impressions. Then place some double-sided tape on the work table where the boards will be placed to hold them in place so they won't stick to the back of the screen when it's lifted. In commercial applications, a vacuum table holds the boards in place; a similar unit can be built to work from your home vacuum cleaner, should you decide to get into volume production. A set of plans for building a vacuum table is also included in the booklet or starter kit, as well as instructions for more complicated techniques such as printing double-sided PC boards and multi-color printing in close registration.
Set the printed boards aside to dry (about 30 minutes), inspect and correct any mistakes, and then etch and drill as you would with any other circuit board process. After etching, the resist can easily be removed with any slightly aggressive solvent or by lightly sanding.
Scrape out the excess ink from the screen and put it back into the can to reuse it another day. Wash the screen well with mineral spirits in a well-ventilated area, and set it aside to dry.
At this point you can save it to reprint the same design or strip it clean with ordinary household bleach to use with an entirely new circuit design.
You can use this same process to print component layout guides on the opposite side of your circuit board, instrument panels, or even signs and book covers. Signplex, in Bessemer, Alabama, offers a kit of materials that allows a beginner to experiment with this process and produce high-quality circuit boards. It contains sufficient material to do 6 to 12 different designs, depending on the board sizes.
Also see: IRON-ON PC BOARD PATTERNS