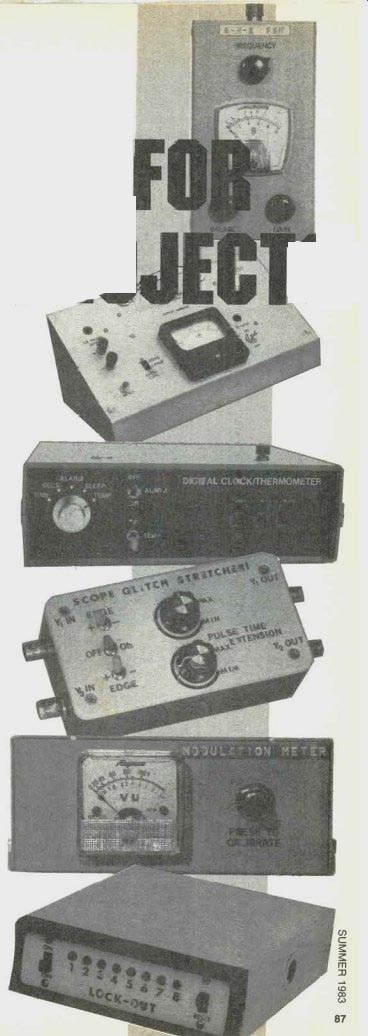
A well-prepared box or cabinet protects the circuit components and encourages the builder to employ the project!
By HERB FRIEDMAN
BACK IN THE EARLY DAYS OF RADIO WHEN GRANDPA WOUND HIS receiver coils around old Quaker-Oats oatmeal boxes, radios were built on wood bases: either the proverbial kitchen breadboard or slabs of mahogany, maple, oak, or anything else with an attractive grain. The wood was usually sanded glass-smooth, and then finished with several layers of stain and hand-rubbed varnish. The finished product was a work of art, often surpassing the appearance of "store bought" equipment-which was also made of wood in them thar' days.
Today, we generally build our homebrew projects in aluminum or plastic cabinets because they are inexpensive materials easily worked with home-workshop tools. But, although metal and plastic don't have the beauty of wood grain, a homebrew project can still be attractive. In fact, spray paint and some decal labels and letters are all that's needed to make a Plain Jane homebrew project look like something that came out of a high-technology (hi-tech) factory.
To illustrate what can be done for even small junkbox projects, we'll show how the cabinet for the Scope Calibrator project (shown elsewhere in this issue) was given a laboratory- instrument appearance. The same procedures can be used for other projects, large or small.
Drill all holes and cutouts first--First step is to select your cabinet and drill the necessary holes; you want to avoid drilling or cutting the cabinet after it's been painted. When you've decided on the cabinet to use, lay out the cabinet hardware and cut all the necessary holes and openings cleanly; nothing looks as sloppy as a beautifully finished project with screws and other hardware hanging half in and half out of oversize holes. If possible, use a drill press (photo 1) and/or chassis punch(s) for the larger openings. If you don't have a drill press at least use an inexpensive, small stand that converts your electric hand drill into a miniature drill press.
For holes 5/16-inch diameter and smaller, a Whitney hand punch (available from the better hardware and tool stores) does a fantastic job on aluminum, PC boards, Bakelite, plastic, or whatever. See photo 2. It leaves a clean, burr-free precision hole. If you need a little extra "oomph" for some- what heavier metal you can clamp the punch in a vise.
If you're lucky enough to have a decent parts store in your area you might be able to pick up a cabinet prepainted in Hammertone Grey; or you might be able to get a plastic cabinet in the desired color. All you'll have to do to finish these cabinets is add the proper labeling for the panel components. More than likely, however, what's available will be an unpainted aluminum cabinet, or a plastic cabinet in a dull color, and your first step will be to paint the cabinet.
Unfortunately, all aluminum cabinets are not alike. In particular, the aluminum cabinets sold by Radio Shack have some form of coating that detergent and acetone won't remove, and the paint-with its panel markings-flakes off almost as soon as you put it on. You tend to get a better paint adhesion from the BUD, Par Metal and LMB aluminum cabinets. However, whatever you use, wipe it down with a strong detergent and then scrub all surfaces to be painted with a medium to coarse steel wool (available from hardware and paint stores) just before you're ready to paint the cabinet.
If you don't want to get paint inside the cabinet when it's spray painted-you might need a clean surface for a ground connection-cover the opening with a strip of electrical or masking tape from inside the cabinet. See photo 3.
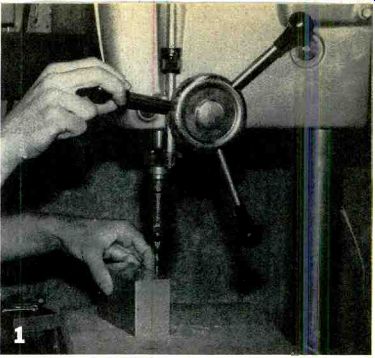
-------- A PRO CABINET starts out with properly drilled panel holes and openings.
You don't want the panel components hanging halt in and out of oversize holes.
Use a drill press or a stand-mounted hand drill if possible. Be sure to clean
out the burrs.
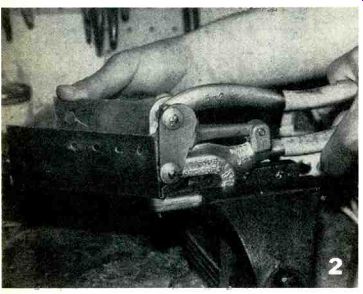
-------- 2. SMALL HOLES are punched cleanly and in perfect position with
a Whitney hand punch that can be secured in a vise for extra heavy metal.
Do not apply pressure to the case as you punch the hole. Punches do not work
well on plastic chairs or boxes.
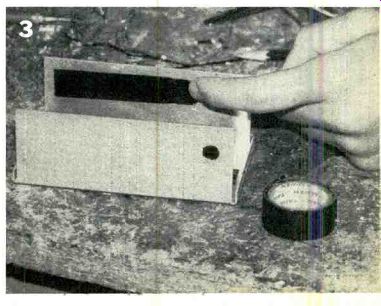
-------- If you plan on painting the cabinet you can keep the spray paint
out of the inside of the cabinet by taping over the holes from the inside.
Actually, careful spraying will limit interior paint covering. A surface
must be scraped clean later at ground tie points.
Paints also aren't all alike
As for the type of paint to use, you will need at least two of the three products similar to those shown in photo 4. The center product in photo 4 is ordinary spray paint...a somewhat inexpensive "private- brand" paint. Funny thing axon: the spray paints, price is not necessarily indicative of quality when it comes to adhering to aluminum. I've had no luck with Rustoleum brand paint; it takes several coats to cover.
Krylon tends to run or peel, depending on the aluminum and how well it's been scrubbed with steel wool. For single coats I've had best results with cheap "private- brands." If your project is going to get rough handling and you would like the paint to stick like glue, use a primer paint as the first coat; it will just take an extra night to finish the paint job. The Krylon Mat-Finish used by artists is an excellent aluminum primer.
Apply evenly, but sparingly over the surface.
Another problem with spray enamel paints is that some reject transfer-type panel markings. Many of the better spray enamels have such high-gloss surfaces when they dry that most of the usual materials used by hobbyists to letter panels won't stick. Again, I've had best results with real cheap private-brand spray paints. If you like the colors of "better" paints and insist on their use, you can try applying an over- coat of clear "matte" or "preparation" paint that's sold in art supply stores. The product is made to provide a "tooth" on slick surfaces. Ask your local art supply dealer; he knows of products we electronic hobbyists rarely get to see.
On the left of photo 4 is DATAKOAT matte protective spray, which is used to protect the lettering, etc., that will be applied to the cabinet. This is a clear paint that merges the lettering (which we'll cover later) into the base coat, and it also protects the finish. The stuff is not the easiest thing to locate and you might have to substitute a product similar to the one shown on the right of photo 4, a standard artist's protective non- glossy spray sold in art supply houses. The stuff smells to the heavens when used, but it protects the panel markings.
I prefer DATAKOAT, but if you can't get it use whatever is suggested by your local art supply store.
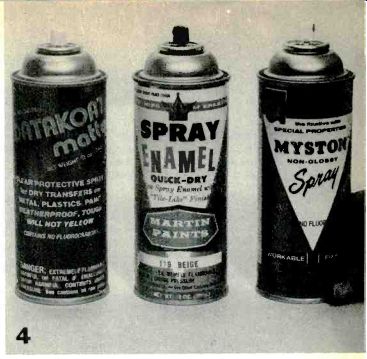
-------4. SPRAY ENAMEL PAINT can in center is an inexpensive kind that
works best. The DATAKOAT clear matte spray at left protects markings you
apply on the panel. The spray can on the left is artist's protective spray
sold in many local art supply houses.
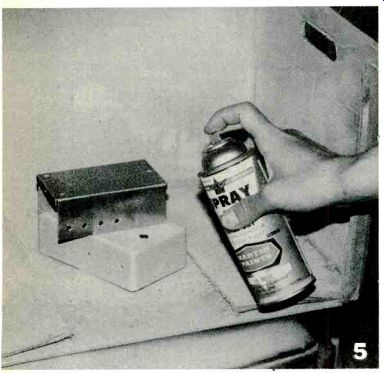
-------5. TO PREVENT THE SPRAY PAINT from coating everything in the shop make
a spray booth from a large cardboard box. Position the cabinet on a wooden
block or small box so it can be moved.
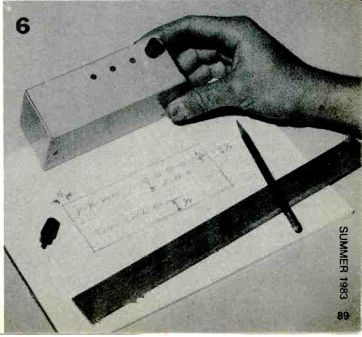
----------6. USING THE CABINET as a guide make a drawing of how you would
like the finished product to look. Indicate the distances from the panel
components to the edge of the panel markings to avoid overlaps. Planning
ahead makes for a better project!
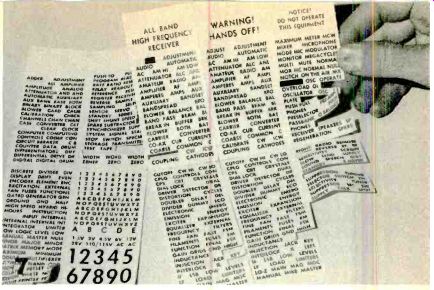
------7. PANEL-MARKING DECALS are complete phrases, characters or letters
on a gelatin base. You cut out the marking you need, soak it ii water to
float off the paper backing, and transfer to the cabinet.
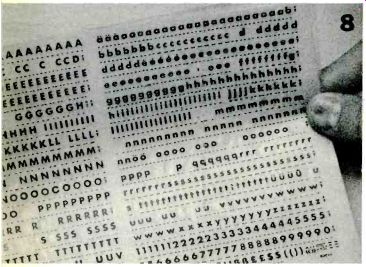
-------8. ANOTHER FORM OF PANEL MARKING is transfer or press type. The letters
are on the back of a clear plastic sheet. Rubbing the sheet with a burnishing
tool causes the wax character to transfer to cabinet.
Spraying
To avoid spraying everything in sight, make yourself a "spray booth" from a large cardboard carton; an egg crate is a good choice. Cut away the front, as shown in photo 5, so you can spray from almost any angle. Place the chassis on a small support a tray, box, or a scrap chassis salvaged from an old project-and spray lightly with broad sweeping motions. Two thin coats are always better than one thick coat; thick coats tend to run, and crinkle when the paint dries. Two thin coats will come out s- m- o- o-t-h, except-of course-for the dust that settles on the wet paint. If you must turn the cabinet you're spraying turn the support. If you touch the cabinet you'll leave your fingerprints in the paint.
While the paint is drying (allow at least a full 24 hours) refer to the drawing of the panel layout you made prior to drilling the holes. If you did not make a drawing-do so now and indicate all spacing between the components and the panel markings. Use the actual panel components for the measurements; don't guess. Try to keep the drawing to scale.
See photo 6. The spacing between the panel markings and the panel components must be accurately indicated in your drawing. Keep in mind that it's difficult to make changes later if you find that some control nut or knob half covers your solidly affixed labels.
Several different products can be used for the panel markings. In the golden age of construction, 1950-1975, most hobbyists used the panel decals shown in photo 7. These were sheets of preprinted standard and not-so- standard panel markings, titles, legends and alphabets. The user cut out the desired marking (as shown in the photograph), soaked the strip in water until the paper backing floated free-leaving the title on a strip of a gelatin-like substance-then placed the strip on the panel. The excess water was squeezed out from under the strip with a cloth, and when the strip dried the marking was permanently affixed to the panel. Of all the various types of panel marking products it's the easiest to handle and apply. The labels were sold under various brands throughout the U.S. The major supplier was G.C. Electronics and Audiotex, though there were many regional brands.
The stuff is still available from some electronics parts distributors.
When you need large, big, or giant markings you'll use what's known as transfer or rub-off type. This consists of a clear plastic sheet with letters or symbols on the back, which transfer to the under surface when rubbed with a stick, ball pen, or burnishing tool. Notice in the sample shown in photo 8 how individual letters have been "used up." As a general rule, transfer type comes in upper (capitals) and lower case sets up to about 20 point. The type you are reading now is 10 point. Larger sizes are available in either all caps or all lower case. There are many different brands available though art supply stores. The best, for electronics experimenter use, is the Letraset brand because most of the sizes have a spacing and alignment guide located under each letter on the sheet.
In photo 9 we show how transfer type is applied. The letter is positioned over the painted cabinet and rubbed with a wood stick, pen, or whatever. When the paper is lifted off the letter will remain on the cabinet. Special Letraset-style transfer type is available with complete titles for electronics panels. It is applied the same way, except the stick is rubbed over the entire title or word.
Notice the paper "shields" taped to the cabinet in photo 9. Often, unwanted transfer-type symbols will transfer to the cabinet wherever you touch the sheet. The markings that stick with the most tenacity to the painted surface are, of course, the ones that "flake off" accidentally. You simply avoid a good part of the problem with the paper shields; most unwanted markings will flake off on the shields.
Photo 10 better illustrates the user of paper shields. Note the large shield to the left of the word "Calibrator." It covers the word "Scope." Without the shield you would find that "fresh" transfer type sheets might actually lift previously applied markings off the cabinet. Also note the small "dashes" on the lower shield. They provide the reference line for the larger type used for the word "Calibrator." The dashes, which are the guide marks from the Letraset transfer sheet, are a lot easier to use than juggling a ruler as a straight edge, and better than marking the panel with a China-type grease pencil; grease pencil doesn't always rub off completely, particularly from light color paints.
One word of caution regarding transfer letters and titles.
The stuff is very fussy as to what you're trying to stick it on. It will not adhere directly to many of the "greasy" aluminum cabinets, nor to most high-gloss enamel paints; it might not even come off its carrier sheet when rubbed with a stick. As a general rule, the inexpensive paints provide better initial adhesion of transfer type. If you find yourself stuck with a cabinet paint job to which the markings won't stick, apply a very thin coat of matte finish or non-glossy clear paint (such as DATAKOAT) over the paint and let it dry for at least 24 hours. The transfer type will stick like glue to the matte surface.
Making it all permanent
Virtually all panel marking material is very fragile when first applied, though the decals are many times "tougher" than transfer type. Often, just brushing them with your fingers will cause parts of characters, or complete characters, to flake off the cabinet. The markings are made permanent by applying a light coat of DATAKOAT or an artist's protective clear spray. Both products very slightly dissolve panel marking material so it merges either with the cabinet paint or the protective clear spray paint. When it all dries the markings are actually part of the paint coat itself, and are immune to damage from normal handling. See photo 11. You'd have to scrape the paint off the cabinet to remove the markings.
Customize
Naturally, you probably have your own ideas as to how you would like to customize your projects. We have touched on the basic principles of "decoration"; the precise type of materials you use will depend primarily on what's available in your neck of the woods. Actually, just about anything that will stick to the cabinet until you can get a protective clear coat to hold it down can be used. If you're not certain a product will work try it on a small piece of scrap aluminum, or a cabinet salvaged from an old project. Whatever you try, the key to success is to always be certain the surface is absolutely dry before you work on it. If in doubt, simply wait 24 hours before you apply each coat of paint to the cabinet, or the panel markings, or whatever.
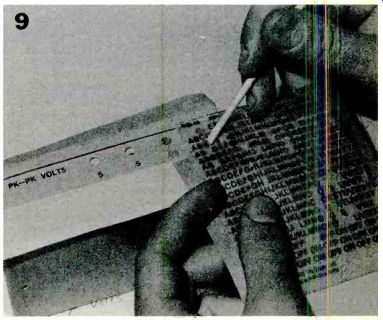
-------- 9. WHEN USING TRANSFER TYPE protect as much painted surface
as is possible with paper shields. Transfer type tends to come off when you
don't want it and it's difficult to remove.
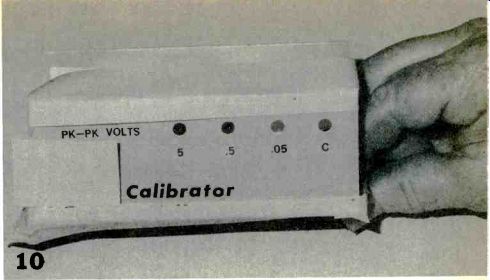
----- 10. AN EXTRA SHIELD has been positioned to cover the word "Scope" which
precedes "Calibrator." Protect any area that might be covered with
the transfer type sheet as you add new markings to the painted cabinet.
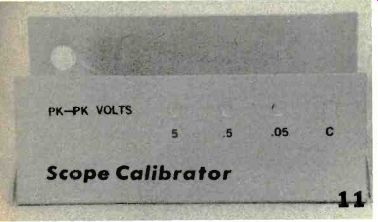
-------11 THE FINISHED CABINET'S front panel is now ready for the panel
components to be mounted. The cabinet has been sprayed with clear DATAKOAT
to protect and secure the panel markings.
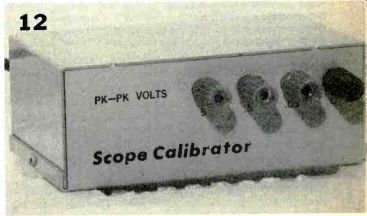
---------12. HERE'S WHAT THE FINISHED PROJECT looks like on your test bench.
What makes the packaging effort worthwhile is that the home-brew project
looks good enough to use, and clearly instructs the user as to its connection
and application with other devices. Beauty takes the beast out of your project.
Adapted from: Radio-Electronics--Special Projects (Summer 1983, #7)
= = = =
Radio-Electronics--Special Projects (USA print magazine)
Also see: Link | --Extra-Low-Power PILOT LIGHT