|
|
EDITING
Editing, which goes hand in hand with mixing and overlaps it, is the task of identifying and tossing out the bad takes, cutting the good takes to length, and putting songs in the desired order. Cutting, pasting, fading in, and fading out replace sonic effects as the tools in play. Once you get your chops as an editor, you might find yourself assembling a song from different pieces of several takes: “I liked howl sang ‘I’ and ‘get’ on take 3 and ‘can’t’ on take 1, and can we overdub ‘no’ again, please?” It’s called “comping” (compiling), and therein lies madness if you aren’t careful. It’s better to try for one good take.


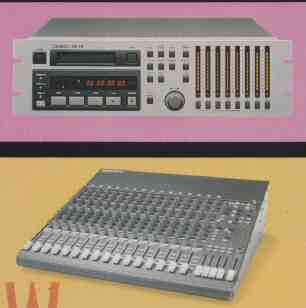
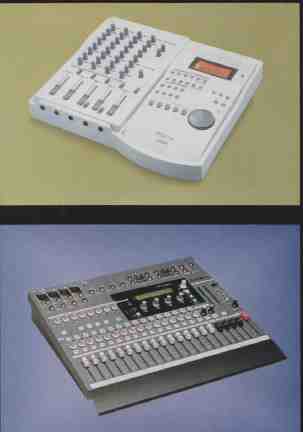
ABOVE---With more tracks, you get more knobs:
Tascam DA-38 digital eight-track recorder, Fostex FD-4 four-track recorder,
Tascam TM-D 1000 digital mixer, and Mackie C1604VLZ analog mixer.
MASTERING
Let’s say you want to put three songs on a CD-R, but when you listen to your test mix, they don’t seem to go together right. The first song sounds good, but the second has more bass and is much louder. The third song starts okay but gets too soft to hear in your car. And when you check how all of them sound in different environments and on different systems (crucial for obtaining a sound you can live with), things often change. Songs that sounded wonderful through your studio monitors may seem much brighter through the tabletop stereos some of your listeners may use.
This is mastering time, when you make those final finishing touches to levels, tonality, and dynamics. Here’s where you give your work a coherent feel. In the pro world, mastering is a secret art practiced by esteemed golden ears. It is rarely done by the engineer at the main recording studio; rather, the tape is usually sent out to a mastering house. Why? To obtain additional expertise (a good thing), and so the lead engineer can point the finger at someone else if the client complains (a bad thing). In home studios, we do our own mastering, thank you very much. And to avoid screwing things up, we won’t do anything more than itsy-bitsy tweaks of tone controls and level. Believe me, 1 dB goes a long way.
The final step is to transfer your master to a CD-R. In the past year or two, this has become affordable, with CD recorders in the $300 to $1,000 range and CD-RW drives for PCs at about $300.
SELECTING EQUIPMENT
There are infinite strategies for starting a home studio and many, many products targeted at that market. What differentiates setups, besides price, is how flexible and expandable they are and how easily each T.O.M.E.M. step can be accomplished. It can get really confusing, especially if you are not sure about what kind of recording projects you’ll be doing. So just consider your options, and spend a few hours playing around in a good music store. You’ll soon gravitate toward one approach or another—more or fewer buttons, more or fewer options, easy to use or complicated. Finding a good dealer is essential, since I can’t cover all the little details, such as what kind of microphone plug fits into what mixer or how to set all those knobs. (How come you’re not getting any sound? How should I know?)
I’ll outline three multitrack system types, from simple to sophisticated, that can deliver stellar sound to put onto your own CD Rs. My suggestions are by no means the only ways to go and won’t cover every base. On the other hand, you can get an idea of the costs involved and begin to figure out where you want to start. First, though, I’ll review a few concepts that apply to all studios.
Unless you want to do nothing but Yanni and Depeche Mode covers, you’ll need some microphones. And the more important reproduction accuracy is to you, the more better-quality mikes you’ll need. Deciding which microphones to buy is difficult, because there’s a lot of advertising BS around and a product-of-the-week mentality reigns. I suggest staying away from really cheap and really expensive stuff and avoiding the latest craze. The classic mikes have been on the market for years, and if that cool new piece your dealer has is so good, you can probably buy it next year for less. If you stick to between $150 and $800 per microphone and stay with the major brands, you should do well. (These prices, and all that follow, are ballpark estimates.)
A lot depends on what you want to record, but for a serious beginner’s most basic chores, I recommend four mikes: one large-diaphragm condenser (the AKG C3000, CAD Equitek E200, and Audio Technica AT4033 are good choices here), two identical small-diaphragm condensers (try a pair of Crown CM-700s, Shure SM81s, or Audio-Technica AT4041s), and one good dynamic mike (the Shure SM57, Audio-Technica ATM25, or Sennheiser MD 421 will fill this bill). The total should set you back about $1,000 to $1,400.
As time goes by, you may want still more microphones, for complex projects and more controllable sound. With a variety of mikes, you can pick the one whose directional and frequency characteristics give you just the effect you need for each situation.
You have to learn your mikes: Some characteristics won’t be apparent from spec sheets, such as subtle colorations in off-axis pickup.
Obviously, your monitor speakers are also critical, because you will use them to make countless decisions about mike placement, equalization and processing, and mix levels. Ideally, the studio monitors should be as transparent, accurate, and neutral as the best speakers you expect your work to be heard on. They need not be huge, how ever, since you will probably be sitting pretty close to them. Don’t be afraid to use high-performance consumer speakers, which often sound much better than similarly priced “pro” monitors. Just be sure that the speakers sound good when you’re close to them and that they can handle the power it takes to monitor a guitar track near its original level. I find that self-powered speakers (such as the NHTPro M00, Event 20/20bas, Mackie HR824, and Paradigm Reference Active/20) are very convenient.
Headphones are also important tools, for assisting in mike placement and for overdubbing. (Sony’s MDR-7506, AKG’s K240M, and Sennheiser’s HD580 are good ‘phones for these jobs.) Ideally, you should have two different types, one pair of closed- ear and one pair of open-ear headphones, to give you fresh perspectives on your mix. Add in mike stands—not to mention cables for the mikes, mixer, and monitors—and your indispensable extras come to any where between $250 and $1,000. So with
the microphones, monitors, and CD recorder included, you’re looking at about $1,500 to $4,500 when it’s time to go shop ping. Could you do it for a lot less? Yes. Lose a mike or two, get just one Set of ‘phones, and mix on recycled hi-fi speakers. Should you? Only if you have to.
Finally, consider effects. Love them or hate them, you have to have some. Besides the obvious creative uses, they can help your recordings sound more realistic. A tasteful touch of reverb, for example, can substitute for some of the natural reverberation your mikes didn’t quite capture. Equalization can be used to compensate for the subjective trade-offs between tonality and, say, stereo imaging that you make when choosing microphone placements. And adding a touch of dynamic compression is a widely accepted way to increase the realism of recorded vocals and percussion.
All of the systems detailed below include very basic effects (so I’ve largely excluded effects boxes from my budget figures). Take time to play around with these built-in effects and see what they can do before you even think about buying anything more. Chances are good, however, that you’ll want to add a decent compressor and maybe a re verb unit as time goes on.
SYSTEM #1: TURNKEY TUNES
If you really want to minimize wiring and setup headaches, there are a number of digital “studio-in-a-box” products on the market that use internal hard drives and built-in mixers, such as Fostex’s four-track FD-4 or eight-track units by Korg (D8) and Roland (VS-880). Just add mikes and monitors, and away you go. These all-in-ones run about $500 to S 1,500, plus S500 for CD burning capability. I recommend spending the extra $500, not just for producing audio CDs but also to allow you to back up each project and remove it from the system when you finish a session or project.
Your total cost for a system based on this option is between about $1,500 and $6,000, including all the extras (mikes, monitors, and such)—not cheap, but not bad for a comprehensive system that can handle a wide range of tasks. Upgrades to consider would be additional microphones, some dedicated mike preamps, and various effects boxes.

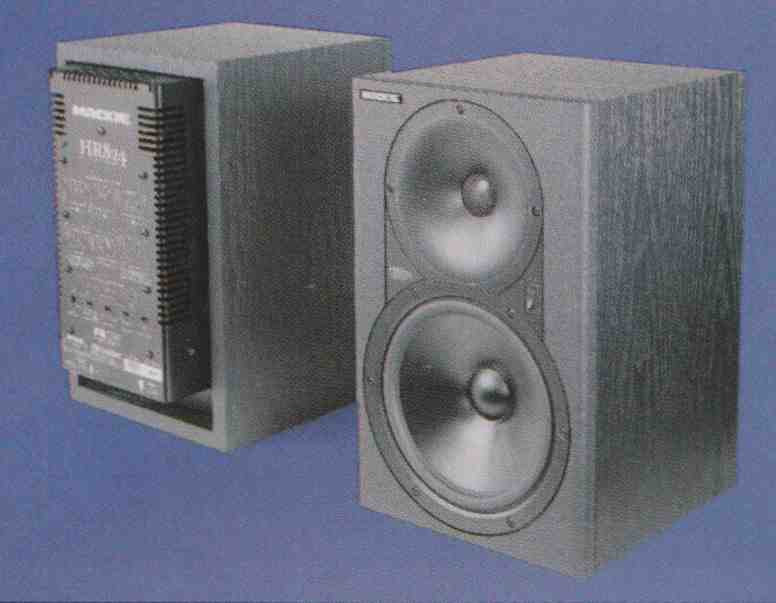
ABOVE: Monitor through good stuff, such as Mackie’s HR824 powered speakers
and AKG’s K240M headphones (not shown).
SYSTEM #2: MIX MASTER
The next option would be to computerize, performing all tracking and editing on the computer screen. This is a very potent upgrade, one that gives you vast power to easily manipulate sound and music. But be ware! You’d better be a gearhead. Computer recording is still in its infancy, and you can’t expect to plug everything together and be up and running the first day. You will be spending a lot of time on the phone with your computer-savvy friends and various tech-support people. But once you are there, look out!
You will need an external analog mixing board to preamplify your mikes before they go to the computer. (Good mixers for this purpose are the Spirit Folio SX and the Mackie CR1604VLZ.) This board can also be used for mixing itself, although many people who learn to mix on a computer screen swear by that. I’d budget about $500 here.
Even though a computer can handle compression, I also recommend a basic external compressor to tame highly dynamic signals before they hit the A/D converter. With extra cables and plug adaptors, expect to pay about $1,000.
Don’t skimp on the computer; it should be fast, a 200-MHz Pentium I or better. Equally important is having a big, really fast hard drive. The faster, the better, and Ultra SCSI-2 is the way to go if you can. Don’t forget to include a CD burner and, of course, an eight-input sound card.
I’ve budgeted $3,000 for the basic computer system. Plan on spending another $1,000 for the sound card, which will come with basic editing software. That should even leave you a bit for more advanced soft ware (such as CakeWalk Pro Audio, SAW Pro, CoolEdit Pro, and SoundForge).
So now we have $5,000 or so for the computer, sound card, mixer, and compressor and $1,500 to $4,000 for the mikes, monitors, and other indispensable extras, totaling about $7,000 to $12,000. There’s plenty more you might want, but I really needn’t mention it at this stage. Get this far, and you’ll be so hooked that you’ll be telling me what I should buy next.
SYSTEM #3: TAPE ME UP!
Building on system #2, we upgrade the mixer to digital and supplement the computer with a multitrack digital tape deck (often called modular digital multi-tracks, or MDM5). These decks record on video cassette—VHS in ADAT systems such as the Alesis LX20, 8mm in the Tascam DA-38 and similar recorders.
Using an MDM really puts us in a different league. In the first place, it gives us al most two hours of uninterrupted multi- track recording, far more than home computers can hold. (With alternate takes, a 15- or 20-minute project can fill up a 9-GB hard drive, fast.) So there’s less need to worry about running out of room during multiple takes. It also lets us switch from one job to another simply by swapping tapes. And forget about having a computer crash wipe out a take or a whole project!
By combining the flexibility and editing capabilities of hard-disk recording with the storage capacity and reliability of tape, you’ll get a studio system that can tackle very complex situations. Further, as your sophistication grows, you’ll find it’s not that hard to sync digital tape with a computer editing setup and have them operate as one seamless whole.
With the Tascam TM-D1000 and Yamaha’s PM 01 and 01v, affordable digital mixers are really starting to come into their own. The features and sound quality that you can get in a home studio these days are amazing. Besides automated faders that record your mix adjustments and can re play them for listening and further adjustment, better digital boards contain dozens of useful signal processors, including equalizers, compressors, and reverbs. This eliminates the need for outboard gear in many situations. Once you digitize the mike signal going into the board, it stays digital for effects processing, editing, mixing, and mastering.
The basic cost of going this route is about $2,000 for the tape deck and $1,500 for the mixer (a net cost of $300 to $900, since it eliminates the need for an analog mixer)— about $2,000 to $3,000 more than system #2. Now the sky is the limit. Some high-end mike preamps? Eight more digital tracks? Synchronization and automation of mixer, computer, and MDM? Some prestige tube powered microphones? Twenty-four-bit converters? How about that new room-simulation software? Sound absorption for your whole garage?
Better sell some tunes!
Also see: I Dream of Gina--Studio-grade at-home recording on a budget
Adapted from 1998 Audio magazine article. Classic Audio and Audio Engineering magazine issues are available for free download at the Internet Archive (archive.org, aka The Wayback Machine)