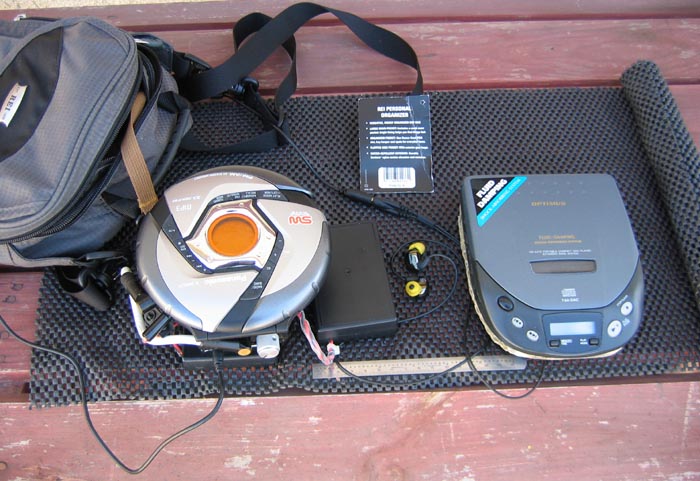
Below: Here is the Panasonic SW967 CD/MP3 player as part of a total, portable high-quality audio system. Left to right: REI Personal Organizer "fanny"/shoulder bag; Panasonic SW967 under which is a Velco'd a headphone amp (on any given day, this may be a DIY PIMETA, Xin Super Macro IV or a Go-Vibe V5) and to it is Velcro'd a DIY 4.8V NiMH-based power supply for the Panasonic player; a DIY 19.2V power supply for the headphone amp; Shure E500 earphones (now Shure SE535); Optimus (Radio Shack) CD-3470 portable CD player -- this one, from 1995, is a better-sounding successor to the infamous CD-3400. The CD-3470 lacks a digital output but, via Line Out jacks, sounds better and has much better shock immunity than the CD-3400; nevertheless, the 3470 lags way behind the Panasonic in terms of sound quality, shock immunity and features. I purchased the Optimus players when they first appeared in the mid 1990's because they were the best, reasonably-priced portable CD players then. Recently, I've seen these legacy Optimus players being sold on eBay for a good chunk of change. Don't waste your money on these antiquated machines -- newer players like the Panasonic SW967 are much better and come with a manufacturer's warranty to boot.
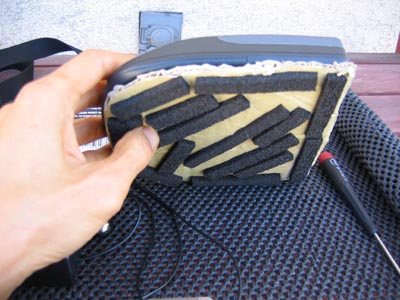
Below: Years ago, I modified the CD-3470 (above right) for improved audio fidelity by applying rope caulk or adhesive tacky putty inside, beneath and in the battery compartment of the unit's chassis. I also made an isolation stand using a sheet of cardboard and foam strips.
Nowadays, my modifying efforts are focused on modern CD players. Like many of today's portable CD players the Panasonic SW967 also features MP3. However, I have chosen to concentrate on its Red Book CD performance. I own or have heard several "high-performance" portable iPod-like hard-drive players (e.g. Cowon iAudio, Apple iPod), which can play many of the so-called lossless audio formats. I still don't think their audio fidelity is in the same league as CD players like the Panasonic SW967.
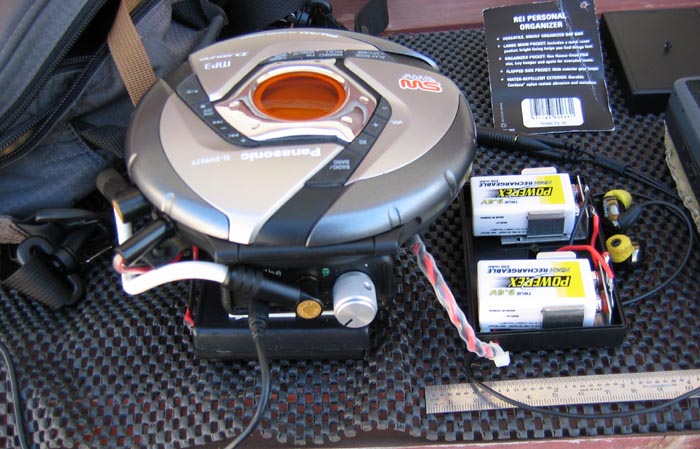
Below: A closer look at the Panasonic SW967, portable headphone amp, a DIY Switchcraft/Canare audio, and various external power supplies (the power supply for the headphone amp is shown with its cover removed), and the amazing Shure E500 earphones (IEM). A steel rule in the foreground gives the image some scale. No -- this setup is not as portable as an iPod, but it sounds much better. Yes -- you can easily and effectively take this system jogging with a mini-bag, like the REI Personal Organizer "fanny"/shoulder bag" on the left.
The use of higher-quality components and beefier more-linear power supplies will definitely improve audio resolution as well as overall system reliability/durability. Now, let's go a little further and improve the audio quality of the already-fine-sounding Panasonic player.
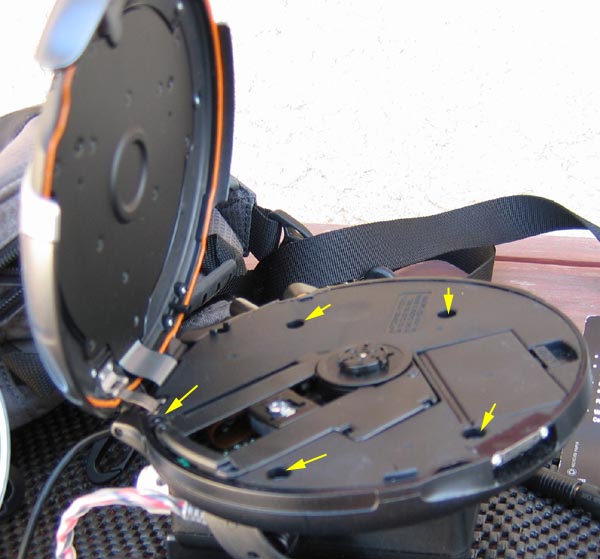
Below: Start by lifting the hinged cover and, then, unscrewing the chassis cover (note the arrows -- there are five screws). Important: keep the player in a horizontal position during and after removing this cover. Otherwise, the transport will pop out of its "holster" possibly damaging the ribbon cable. Keep the cover vertical, too, while and after removing it; otherwise, the tiny screws will fall out. You can keep the screws in their wells if you put a piece of tape over it.
Below: Here's what you will see next. Note the the position of the clock (aka the oscillator). Delicately cover it and the surrounding capacitors with a little bit of rope caulk or adhesive tacky putty. Careful: do not get any caulk/tack on the transport or the four transport-suspension struts (red arrows).
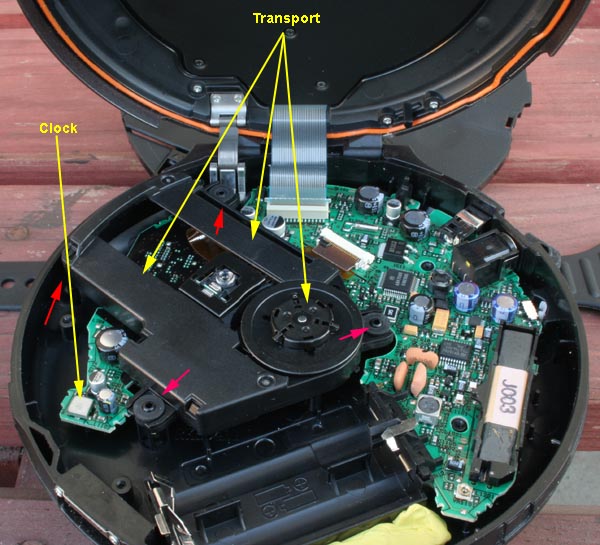
Below: The clock (oscillator) and its surrounding capacitors are now effectively damped. This will help eliminate some jitter and improve sound.

Below: Keep applying rope caulk and/or tack to areas shown, keeping the stuff off the transport or near it. Also, do not damp (caulk) the battery compartment unless you're sure you will always be using an external power supply. Actually, there is a way to damp the battery compartment and still keep it ready for battery use (see below). (Note: I used both rope caulk (white) and sticky plastic tack. I prefer the tack over the rope caulk (less residue on hands, and a bit easier to work with). For large projects -- or if you do a lot of mods -- rope caulk is much more cost effective.

Below: Recall the chassis cover with the five screws? Flip it over and apply rope caulk to the areas shown. (Again stay clear of areas near the transport by keeping rope caulk or other damping compounds out of transport or its suspension.) Notice that I put a large chunk on the hinged battery door.
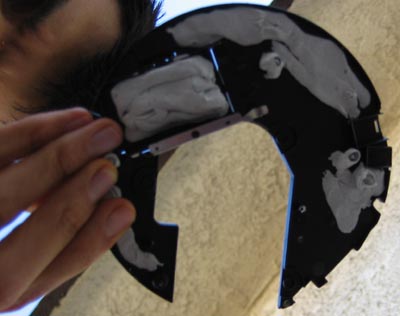
Apply a little bit of Vibra-Tite on all screws, then reinstall the cover above. The Vibra-Tite will damp the coupling between the screw and chassis).
Below: The battery compartment is still usable if one simply removes the chunk of rope caulk stuck to the compartment door.

Put a CD into the player and press play. If you have problems, such as an error message, troubleshoot by retracing the steps above. Even if the disc plays "okay", make sure there are no unusual noises coming from the player. You can check for this by holding the player close to your ear and listening for cyclic "rubbing" or grinding noises.
A successful application of this modification will result in a very noticeable improvement in sound quality. I think its worth the "trouble."
End of mod.
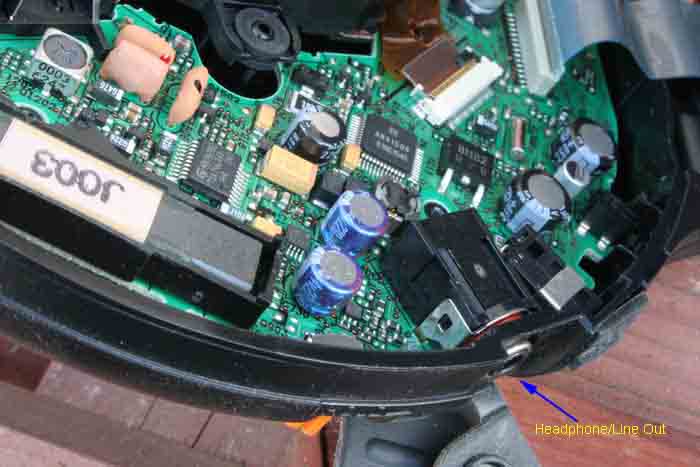
Below: A closer look at a portion of the Panasonic SW967's circuit board. A reason why the stock unit features decent audio is the use of higher-quality capacitors: the SW967 uses Panasonic's own as well as Nichicon.
Home | My
PC-based A/V System (circa March 2004) | My
Home A/V System (circa
2001)