Here are some helpful tips for flush-mounting odd-shaped drivers.
By RB
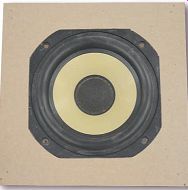
We all know the importance of flush-mounting drivers in our DIY speakers, right? Well, a while ago I started on a Focal-based home-theater speaker system. I was all ready to begin until I got to the drivers-a round woofer with square sides and square tweeter with rounded corners. How was I going to flush-mount these? I scratched my head for a while and came up with this method. It is quick, easy, and makes perfect-fit flush mounts for drivers of any shape or size.
I am by no means a master cabinet maker, so if you have any comments or suggestions, I-and other readers- would love to hear them.
-- A perfect fit!
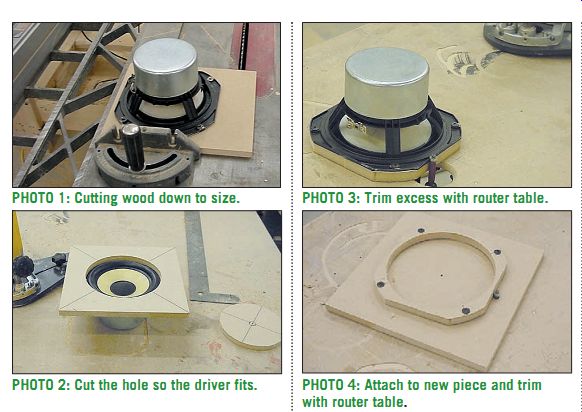
PHOTO 1: Cutting wood down to size.
PHOTO 2: Cut the hole so the driver fits.
PHOTO 3: Trim excess with router table.
PHOTO 4: Attach to new piece and trim with router table.
SAFETY FIRST
Always wear safety glasses and follow the tool manufacturer's instructions. Most important, wear hearing protection! No use building speakers if you are going to be deaf! First, cut five pieces of the ¹/2” MDF to a size approximately 2” larger, on all sides, than the driver to be flush mounted (Photo 1). This should give plenty of room for your fingers, which you will want to keep the length they are. Now mark the center of the MDF boards and drill a pilot hole through two pieces. Here is where a circle jig comes in handy. This indispensable tool for the DIY speaker builder yields perfect circles every time.
If you are countersinking tweeters, I recommend removing their faceplates to prevent tweeter damage. Cut a hole in one of the pieces of wood to the out side diameter of the surround of the driver (Photo 2). Do not throw this piece away yet! Next, mount the driver inverted to this piece of wood using screws and two washers per screw to space the woofer off the wood (Photo 3). Here is where another "make it yourself tool" comes in handy-a router table. Mine is an old worktable. I cut a 2? hole close to the end of it and made a bracket to hold my plunge router. Combined with a flush trim bit, this works wonders for cutting many identically shaped pieces.
Router off all the excess wood, leaving a piece the exact shape you desire.
Remove the driver, blow off the dust, and put it away. Using the pilot holes as guides, attach the circular piece you cut out of the first piece to the second piece of MDF. Cut a strip of the gasket tape into nine 1? long pieces. Stick them three high at equal distances around the circular piece.
TEMPLATE
You can now mount the shaped piece together with a fresh piece and remove the center piece. Drill a ³/8” hole through a new piece of MDF on the very edge of the shaped piece (Photo 4). Next, care fully trim the shape of the piece into the new MDF, leaving a hole in the MDF exactly 3/8” larger than the driver (Photo 5).
This is the pattern for your template so it must be perfect! I cannot stress this enough-better to do it right now than to mess up a baffle! Square any corners with a chisel if necessary (Photo 6).
Now that you have a perfect pattern, it is time to shrink it down to size! Short of going to your local electronics sup ply store and buying the parts necessary to build a DIY MDF shrinker, you'll need to use a router.
Attach the pattern to a fresh piece of MDF. Using a plunge router with
a 1/4” straight cutting bit and a ³/8“ bushing guide, cut out the middle
section. This will leave the original pattern and the new one, which
is 1/8” smaller than the original. Repeat this step to produce your template,
which should be 1/8” larger than the driver all th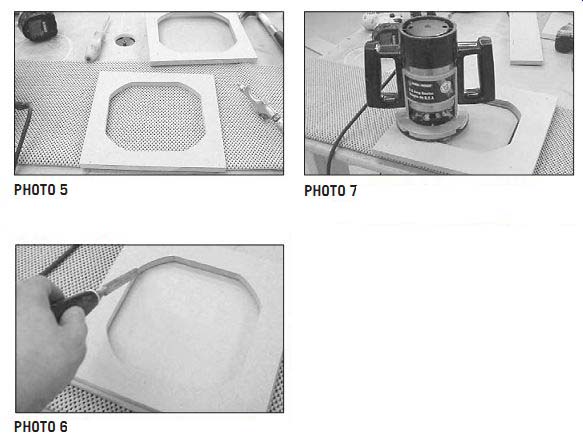 e
way around.
e
way around.
PHOTO 5: Here is the first pattern ³/8” larger than driver. After two
more repetitions, it will be ¹/8” larger.
PHOTO 6: Square corners if necessary.
PHOTO 7: After setting router to depth, remove all excess within pattern.
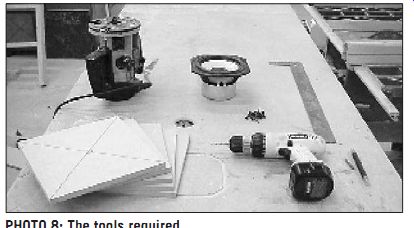
PHOTO 8: The tools required.
INSTALLATION
To countersink your drivers now is easy. Cut the hole in the baffle for the driver and mount it. Using the ¹/8” foam tape, line the inside of the template.
This acts as a spacer to guide the tem plate so the driver is exactly centered.
Attach the template using air nails or wood clamps or two-sided foam tape, and remove the driver and foam tape.
Using the plunge router with ³/8” bushing and ¹/4” straight bit, set the depth you want the driver countersunk, remembering to account for veneer and gasket thickness. You can now remove all the excess wood inside the template (Photo 7). Remove the tem plate and square out any corners if necessary, and you have a perfect countersunk hole.
It is that easy! I hope that this will aid readers in the construction of speaker cabinets and add to their enjoyment of speaker building!
TOOLS AND PARTS
Photo 8 Handful of ³/4” screws 8 ¹/16” thick washers ¹/8” thick foam gasket tape ¹/2” MDF-size dependent on driver size
Plunge router
Router table (if you have one)
Circle jig (again if you have)
Jig saw or table saw
¹/4” straight cut router bit
³/8” flush trim router bit
Router base attachment with ³/8” guide
Drill
ABOUT THE AUTHOR
RB is employed as an auto sound and security installer in Winnipeg, Manitoba. He runs a small DIY supply company on the Internet at hifiaudiolabs.com servicing the Canadian DIYer. He is currently enrolled in an electronics technician course.
----------------------
Also see: